Northstar Manual
Part 1: Admin Portal Overview
The where and what of the admin portal
Location Selection Landing Page
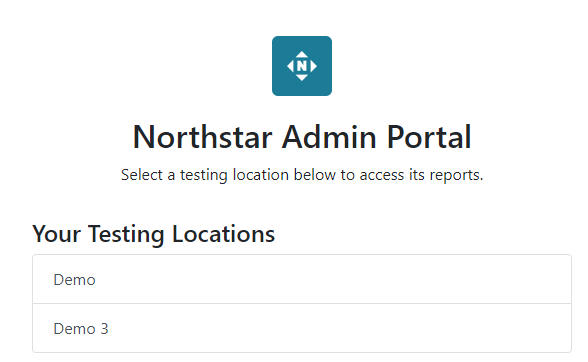
Proctors or administrators of multiple Northstar locations will need to select a location. Those who are affiliated with only one Northstar location will not see this page.
Admin Portal Homepage
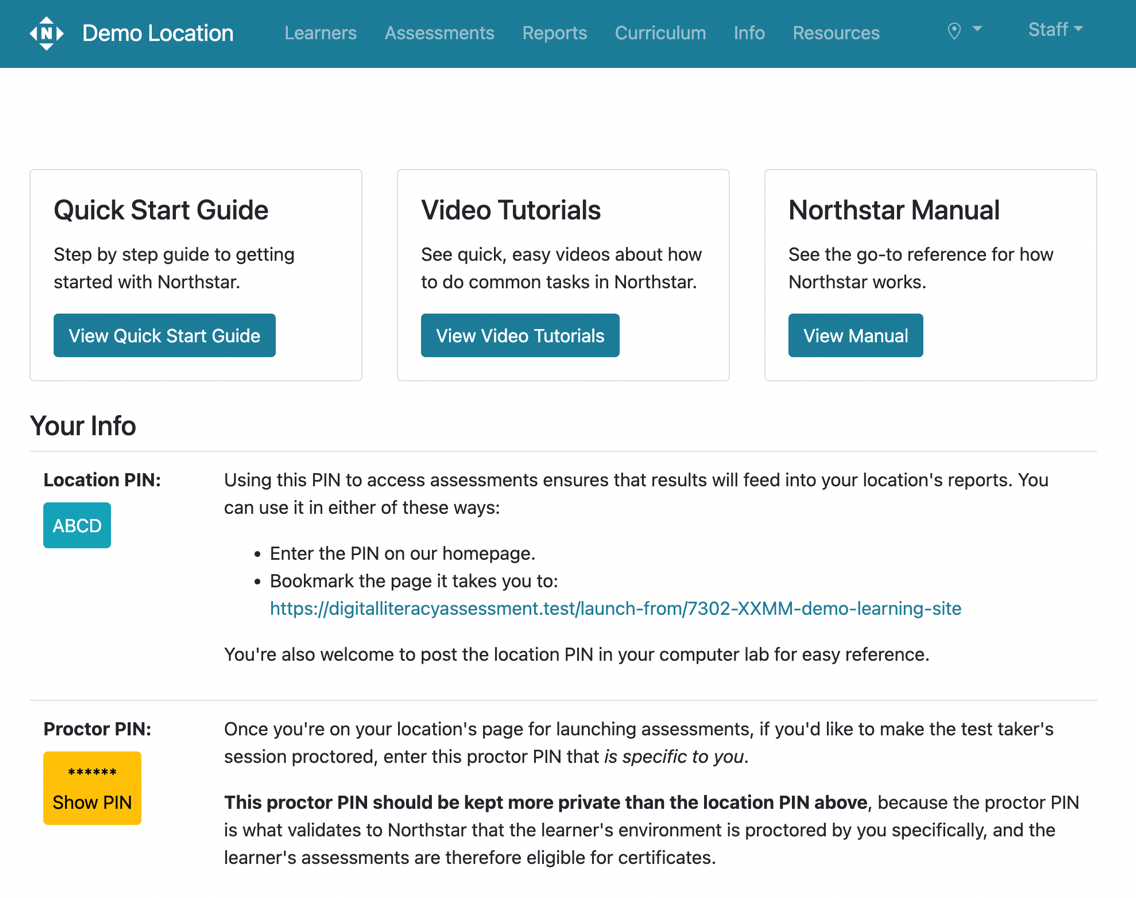
This is the first page most people will see upon entering the admin portal. It is your primary reference for some important information you will frequently use, such as your Location PIN and your personal Proctor PIN.
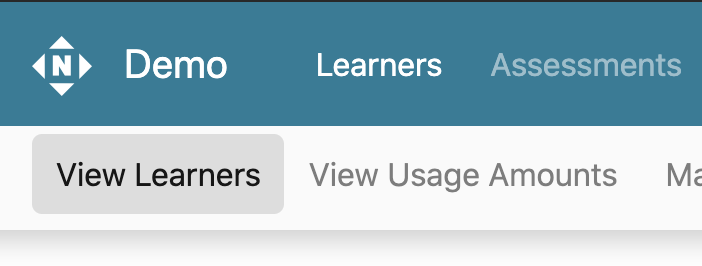
Learners Tab
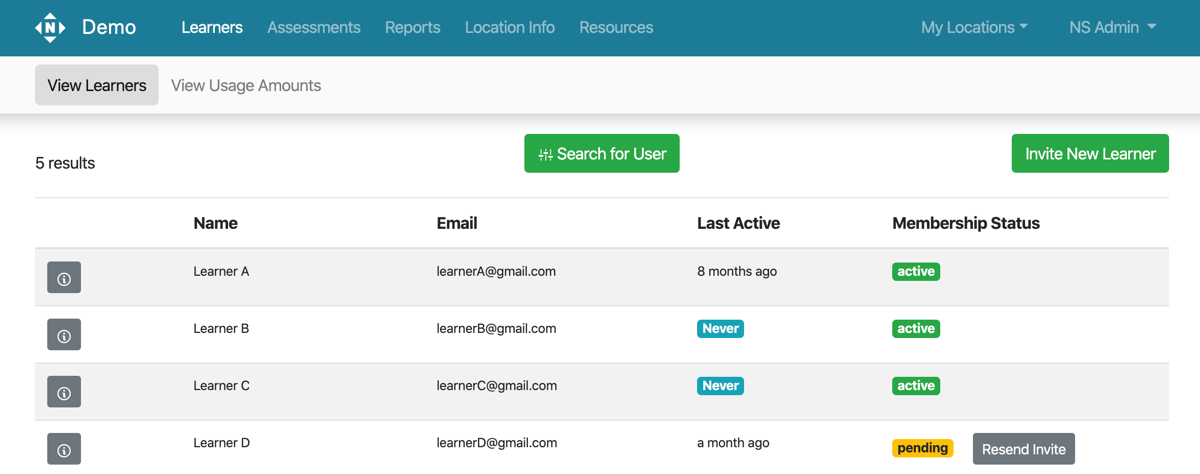
The Learners tab is where you can manage Northstar Online Learning (NSOL). In this tab, you can set up new learner accounts, manage current learner accounts, and check on learner progress. You can also view and download usage reports that show how many hours learners are using NSOL both at and away from the Northstar location.
For more information on using the Learners tab, see Part 3: Using Northstar Online Learning (NSOL) for Staff.
Assessments Tab
This tab lets you set up and manage proctoring sessions. On their computers, learners can request to take a proctored assessment. On your computer, you can approve their requests in the Assessments tab.

This tab also gives you access to specific test taker results. It offers filtering options to view assessment results from groups or individuals. After a proctor or administrator chooses a filtering option, it displays a results page that includes each test taker's name, time of test, module name, proctor, number correct, score (with passing/failing mark), badge status, and certificate generating options.
For more information on administering assessments, see Part 2: Administering Northstar Assessments.
Reports Tab
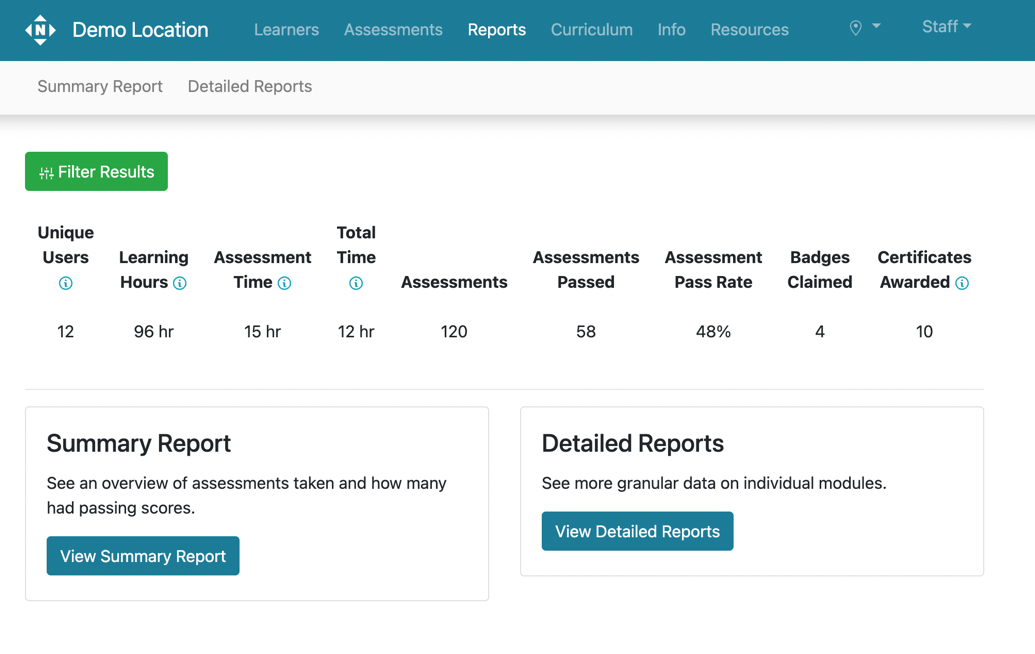
This tab displays quick at-a-glance data points about your Northstar Location, as well as links to view and download Detailed Reports and a Summary Report.
Curriculum Tab
This tab allows Northstar staff to access the Northstar Digital Literacy Curriculum. For more information on using the curriculum, please see Part 6: Northstar Curricula Resources.
Location Info tab
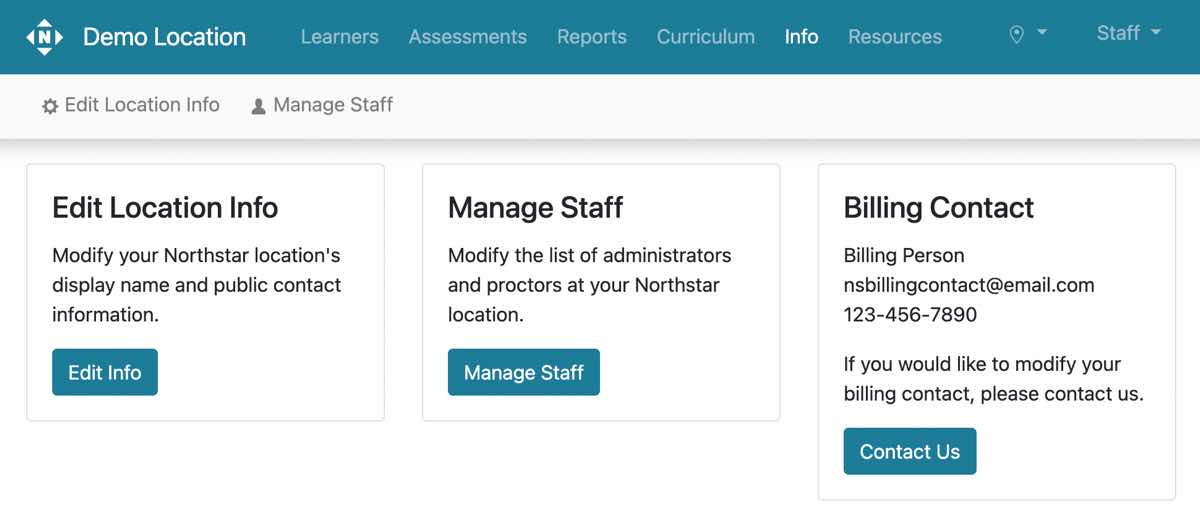
The Location Info tab allows access to edit Northstar location information, to manage staff (administrator and proctor access), and to view your billing contact. This tab is only available for Administrators. Other staff can click on this tab to view the name and contact info of their location’s admins.
For more information on managing location info, see Part 5: Using Northstar for Administrators.
Resources Tab
This tab provides various resources for Northstar locations, including:
- The classroom curriculum
- Video tutorials
- Our Quick Start Guide
- A link to this manual
- The form to create a support ticket to ask for help
- FAQs
- And more
My Locations Tab
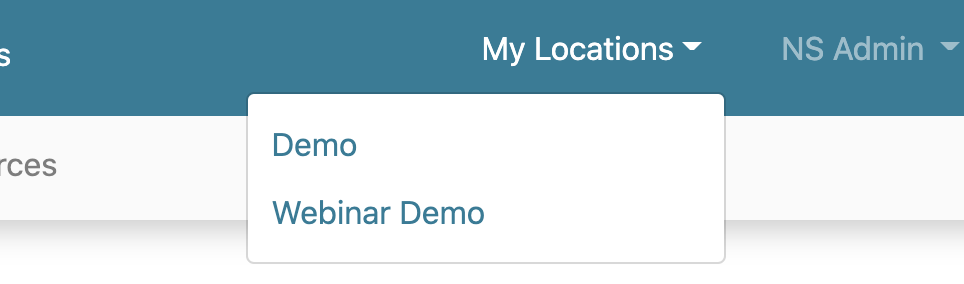
If you are a proctor or admin at multiple Northstar locations, this tab features a drop-down menu you can use to switch between tabs.
Personal Profile
Click on your name to open a dropdown menu that allows you to edit your personal information (including to generate a new Proctor PIN), navigate to the Northstar homepage or Northstar Online Learning, and log out of your account.
For more info on editing your personal info, see Part 7: Managing your Personal Northstar Account.
Part 2: Administering Northstar Assessments
Proctoring assessments
Northstar features two methods to proctor assessments:
For proctoring large groups or remote proctoring, proctors can start a proctoring session via test taker request. Using this method, test takers request to start a proctored assessment on their computer. Proctors approve the request in the Admin Portal from their computer.
For proctoring small groups in-person, proctors can start a proctoring session on test takers’ computers using a Proctor PIN. Using this method, proctors enter a special code onto a test taker’s computer to enable proctoring mode.
Both of these methods are described below.
Proctoring an assessment via test taker request (for remote proctoring or large groups)
- On the proctor’s computer, log into the Admin Portal. Then, click on the Assessments tab.
- Click Start New Proctor Session.

- Check the test taker's photo ID.
- For more information on setting up a remote proctoring session, please see our guide on Best Practices for Remote Proctoring, as well as our Remote Test Taker Checklist.
- Ensure the test taker is on a computer with audio capabilities.
- Assist the test taker in navigating to your location’s testing launch page through either of the following options.
- Option 1: Start from https://www.digitalliteracyassessment.org/. Type your four-character Location PIN in the field above the assessments and click Go.

- Option 2: Start from your bookmarked location-specific assessment-launch page. When using this URL, no Location PIN is necessary. You may want to share this link in the chat window for remote-proctoring sessions, e.g. in Zoom.
- The test taker enters their name as it should appear on their certificates in the first and last name boxes and then clicks Continue, or the test taker logs into their Northstar Online Learning account.
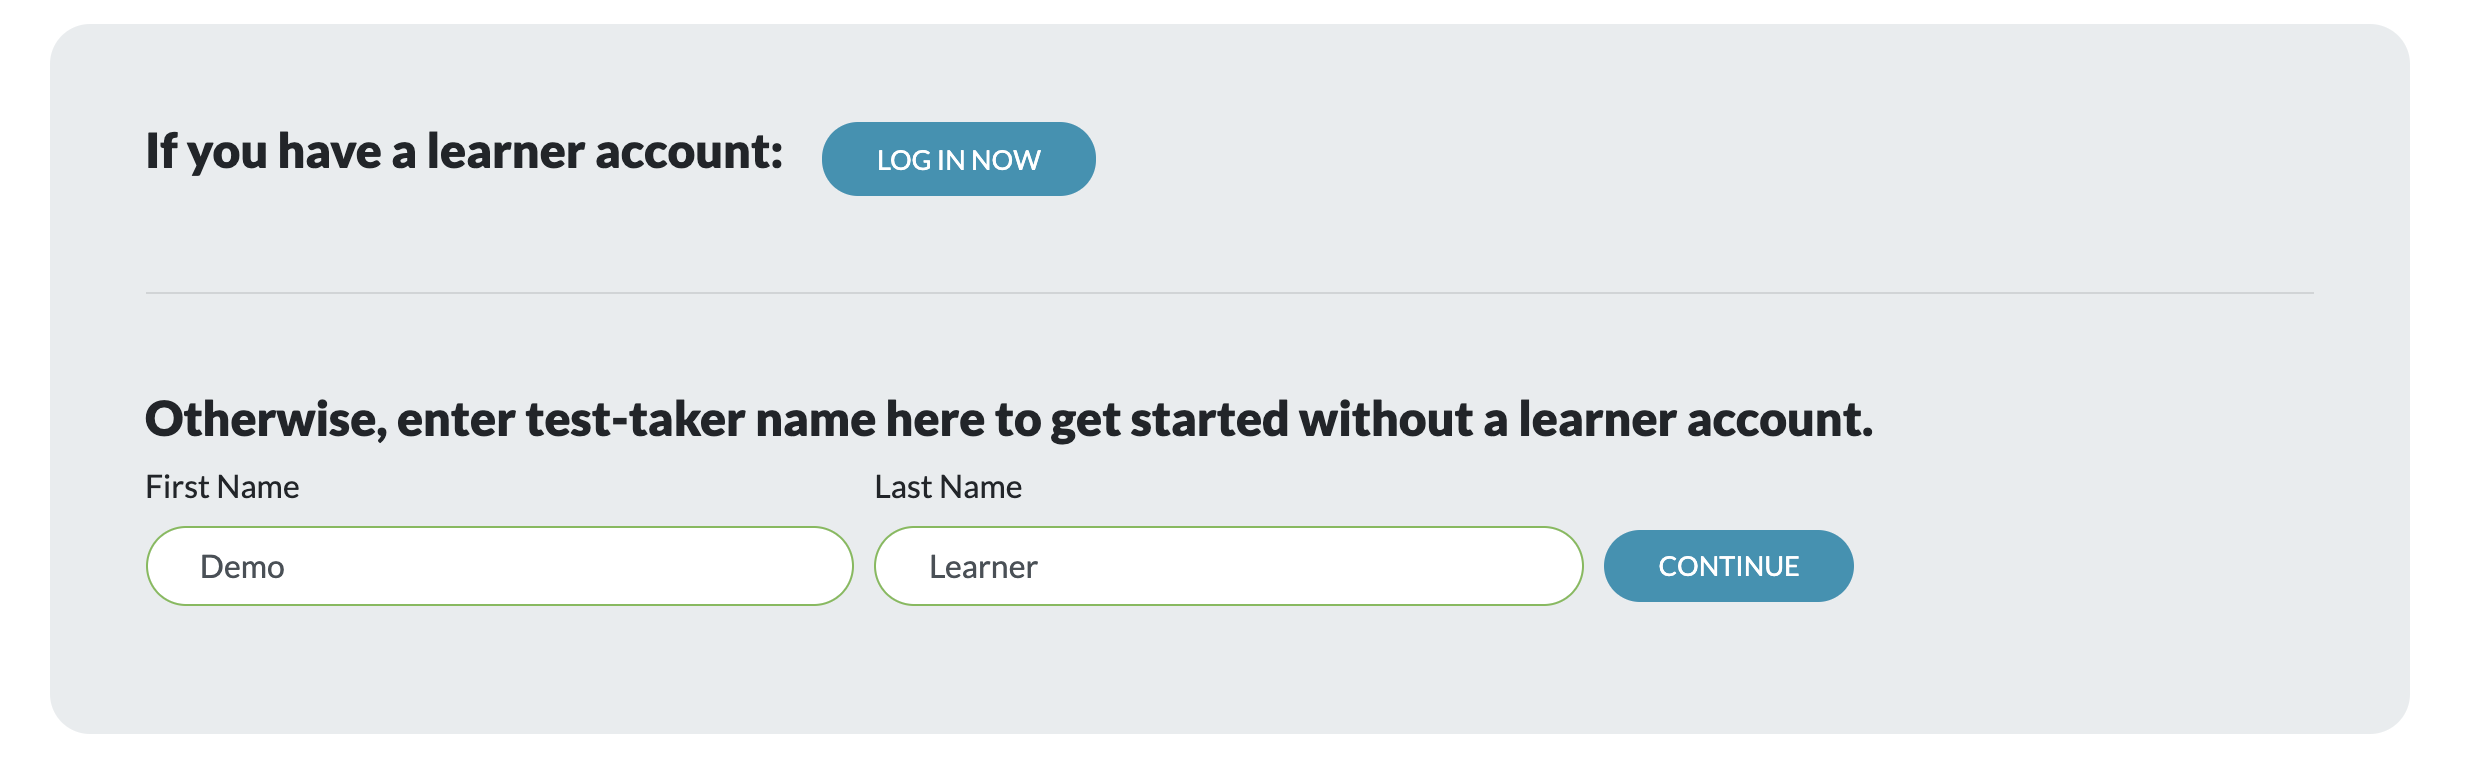
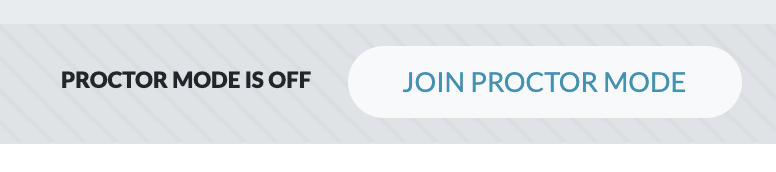
- The test taker clicks Join Proctor Mode. The screen will now read, “Waiting for Proctor Response.”
- On the proctor’s computer, click on Start Proctoring next to a test taker’s name to enable proctoring mode. Each proctoring session must be enabled individually.

- Tip: the proctoring page will auto-refresh regularly to show you the latest information about test takers. However, if a test taker’s request is not appearing quickly enough, click the Sync button at the top to refresh the page immediately.
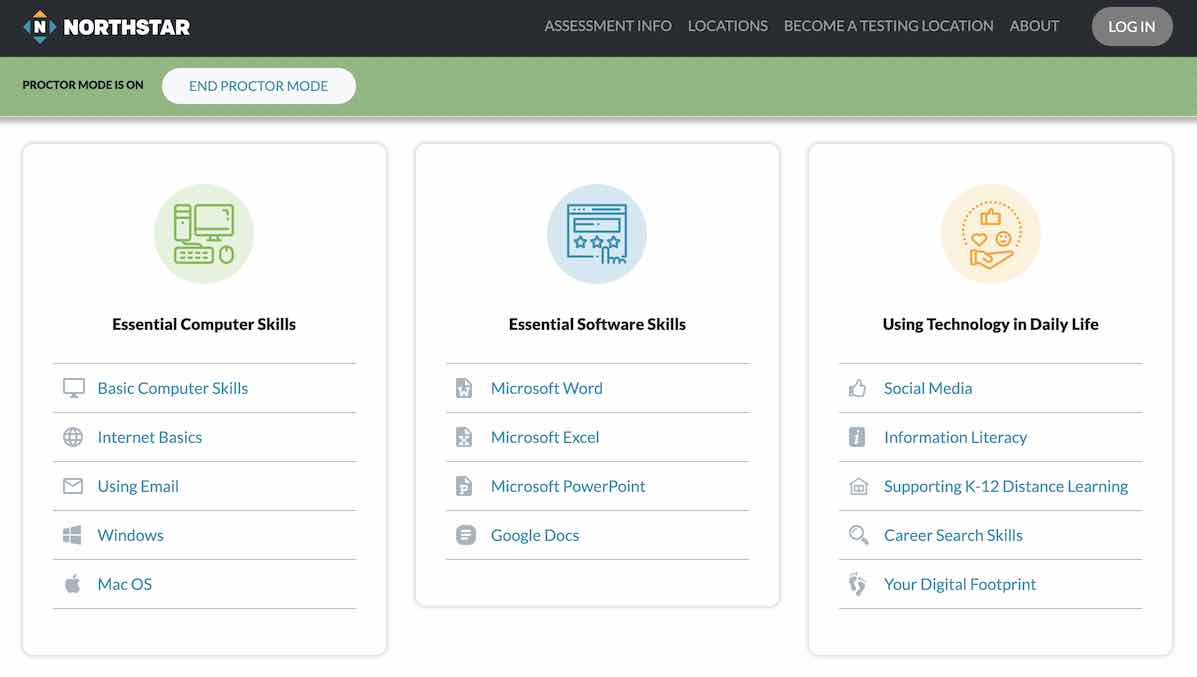
- On the test taker’s computer, the screen will now read, “Proctor mode is on”.
- Give test takers a verbal introduction to the assessment and procedures, and allow them to read the codes of conduct.
- Test takers select the assessment they wish to begin.
- When test takers finish, you can click Stop Proctoring next to their name to end their individual proctoring session. Alternatively, test takers can click to disable proctoring mode on the assessment-launch screen where the session began.

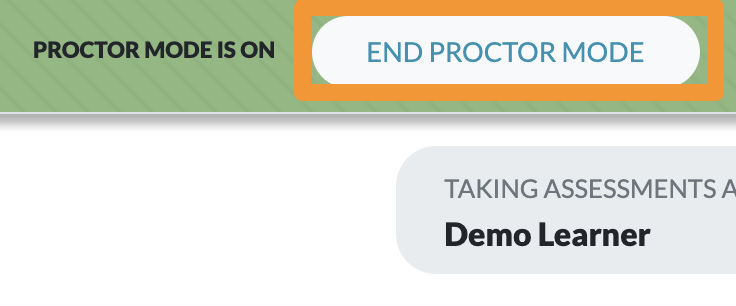
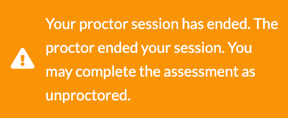
- At the top, click End Proctor Mode to end the proctoring session for all test takers. (Note: if any test takers are still taking assessments when you end their session, an alert will appear telling them that their proctoring session has ended, and their assessments will be saved as unproctored if they choose to complete them.)
Watch the process here:
Proctoring an assessment using a Proctor PIN (for small group in-person proctoring)
- Check the test taker's photo ID.
- Assign the test taker to a computer with audio capabilities.
- Open your location’s testing launch page through either of the following options:
- Option 1: Start from https://www.digitalliteracyassessment.org/. Type your four-character Location PIN in the field above the assessments and click Go.
- Option 2: Start from your bookmarked location-specific assessment-launch page. When using this URL, no Location PIN is necessary.
- The test taker enters their name as it should appear on their certificate and then clicks Continue, or the test taker logs into their Northstar Online Learning account. Tip: If your Northstar location has an identifier that you typically use for your learners outside of Northstar, you can include that identifier using a special syntax for the Last Name field that includes parentheses and the # symbol. For example, instead of putting "Smith" as the last name, you could put "Smith (#1234)" if the user's identifier is 1234. Identifiers will be visible in the admin portal as well, except are intentionally removed from certificates so that only the learner's name is visible. (Note: we do discourage putting sensitive identifiers into Northstar.)
- Click the button labeled Validate Computer via PIN.
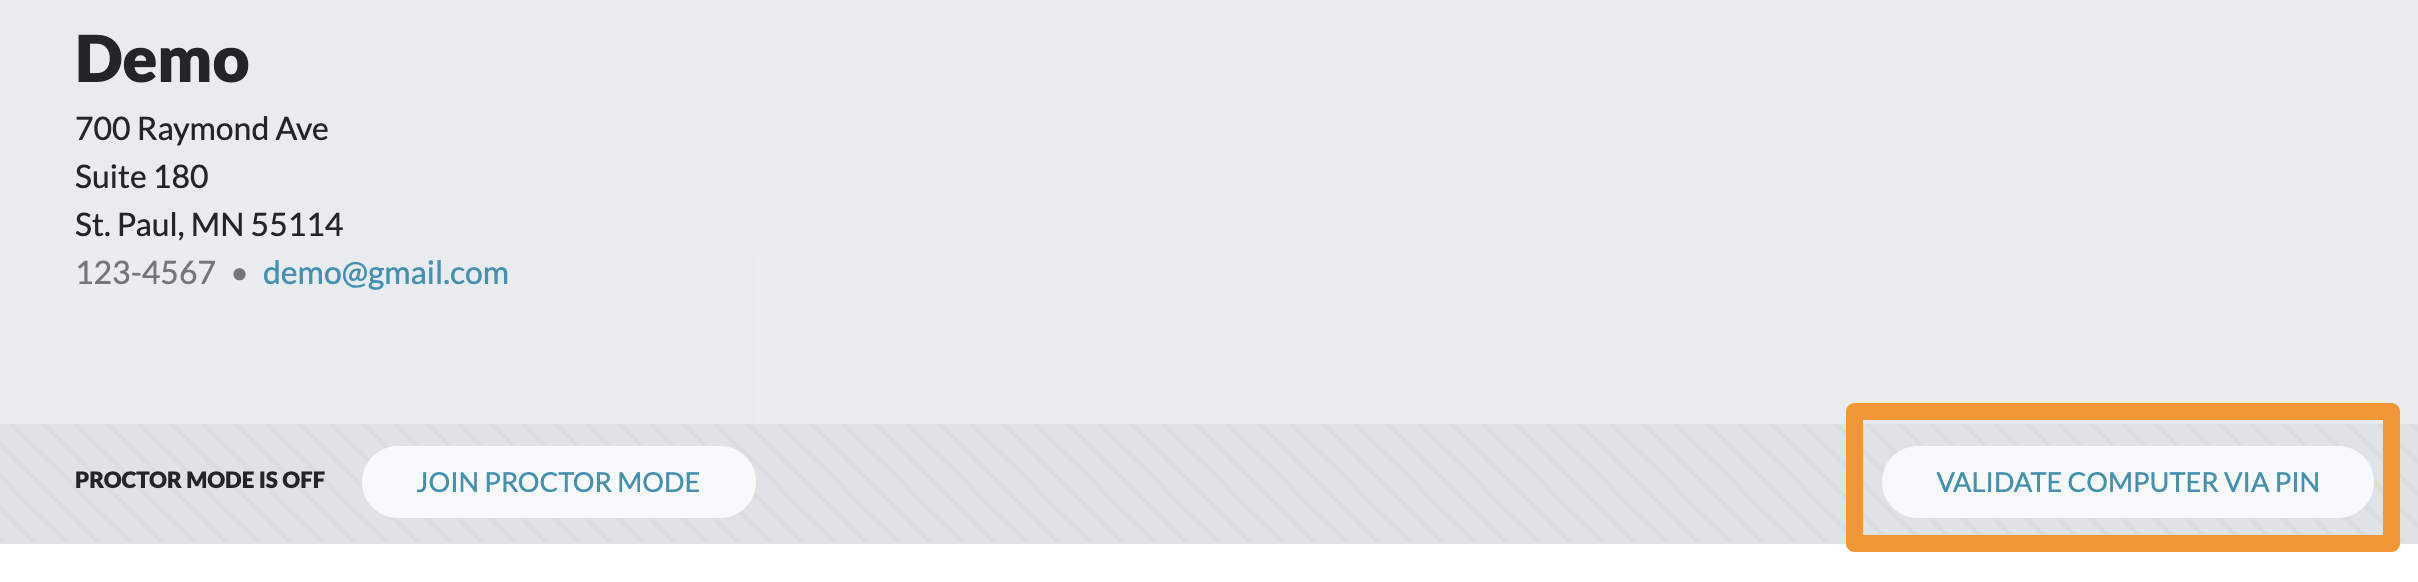
- Type in your six-character Proctor PIN.
- Click Authorize. The screen will now read, "Proctor Mode is On."
- Give test takers a verbal introduction to the assessment and procedures, and allow them to read the codes of conduct.
- Test taker selects the assessment they wish to begin.
- When they've completed their assessment(s), click End Proctor Mode on the test taker’s computer to turn off proctor mode.
Watch the process here:
Viewing Proctor Sessions in Progress
- To view active proctor sessions, log into the Admin Portal, click on the Assessments tab, and then click on Proctoring to open a page with all past and active proctor sessions.
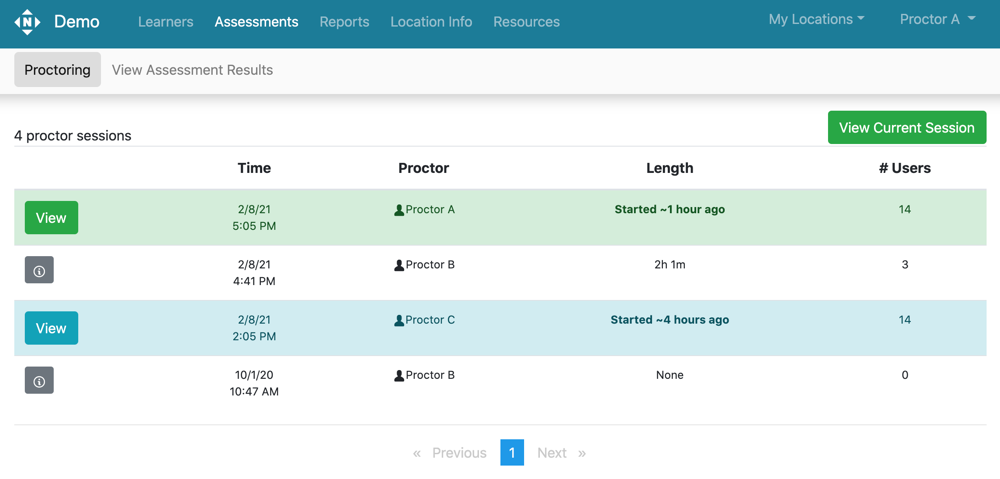
- Click View to see the details of a proctor session.
- Your active session will be highlighted in green. Active sessions for other proctors will be highlighted in blue.
- View shows the status of your proctor session and the status of each test taker, including assessments in progress and completed assessments.

- To end a proctoring session for one test taker, click Stop Proctoring next to their name. If the user has not finished taking an assessment, a pop-up will appear on the test taker’s screen notifying them they may complete the assessment unproctored.
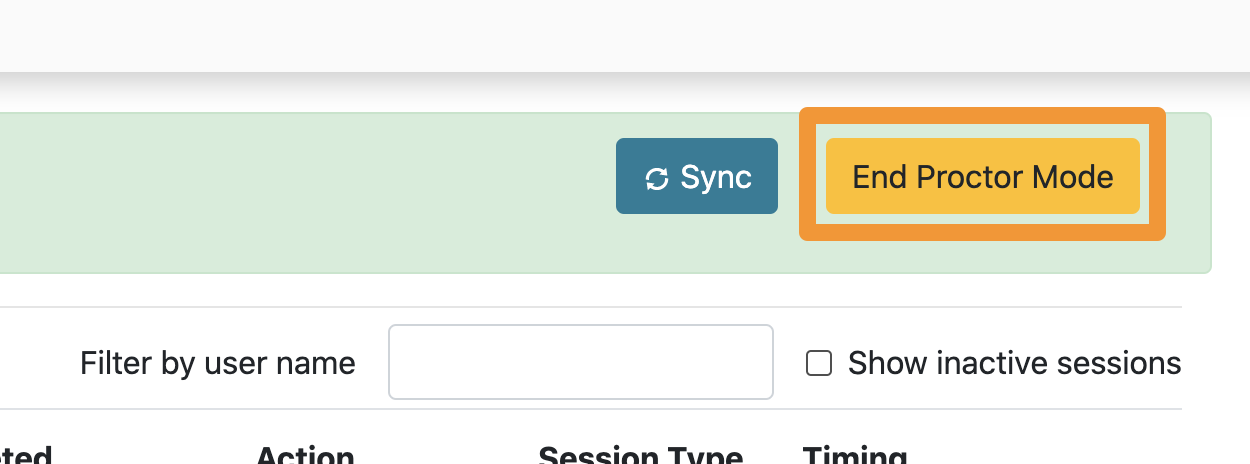
- To end the proctoring session for all test takers, click End Proctor Mode at the top.
Watch the process here:
Changing assessment language
- On the testing launch page, use the language drop-down menu to select another language.
- Note: some assessments might not be available in other languages.
Launching tagged assessments
- You can send test takers a link that will automatically apply a tag to their assessment. In the Admin Portal, open the Learners tab and click Manage Tags. Note: auto-assigning tags in this way only works for assessments taken by users that enter their first and last name when taking the assessment. Assessments taken while logged into a user account via email and password cannot be auto-tagged in this way.
- Next to a tag, click Copy Launch URL.

- Send the URL to a learner. That URL will open your assessment launch page. When the learner finishes an assessment, it will already be tagged.
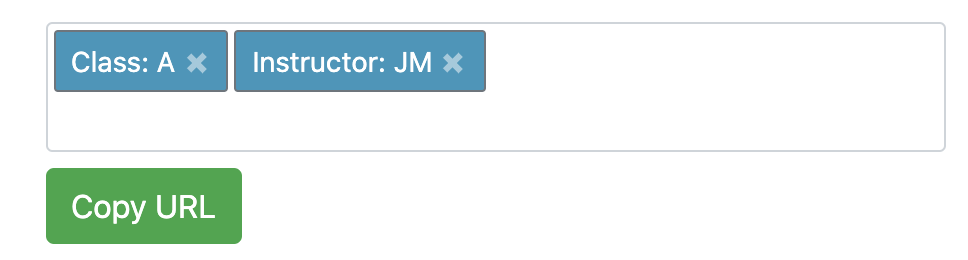
- To create a launch URL with multiple tags, enter the tags in the Multi-Tag Launch URL field at the bottom of the page and click Copy URL.
Viewing and downloading individual results
In admin portal: Assessments tab
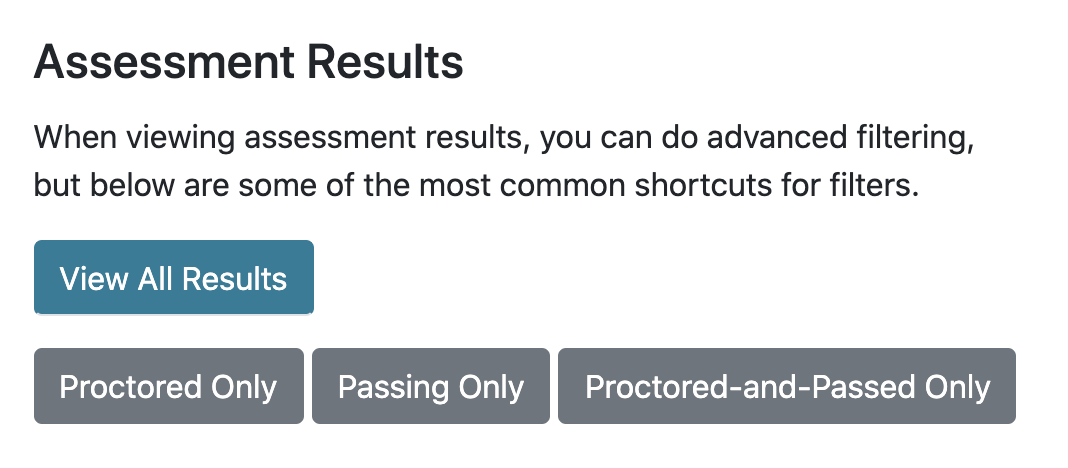
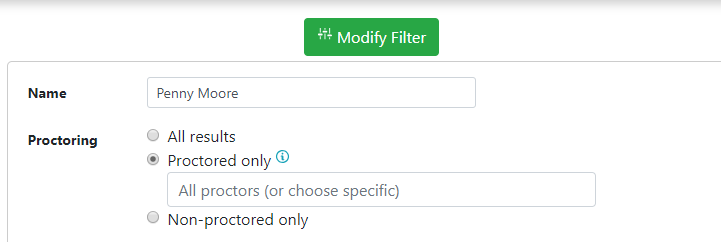
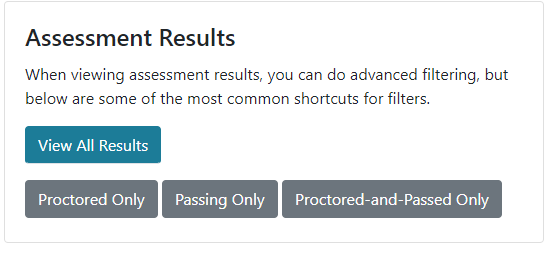
- To view all results, select the View All Results button. Alternatively, click one of the three buttons below to use a shortcut filter for Proctored only results, Passing only, or Proctored and Passing only.
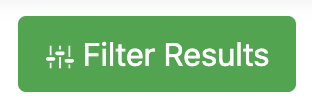
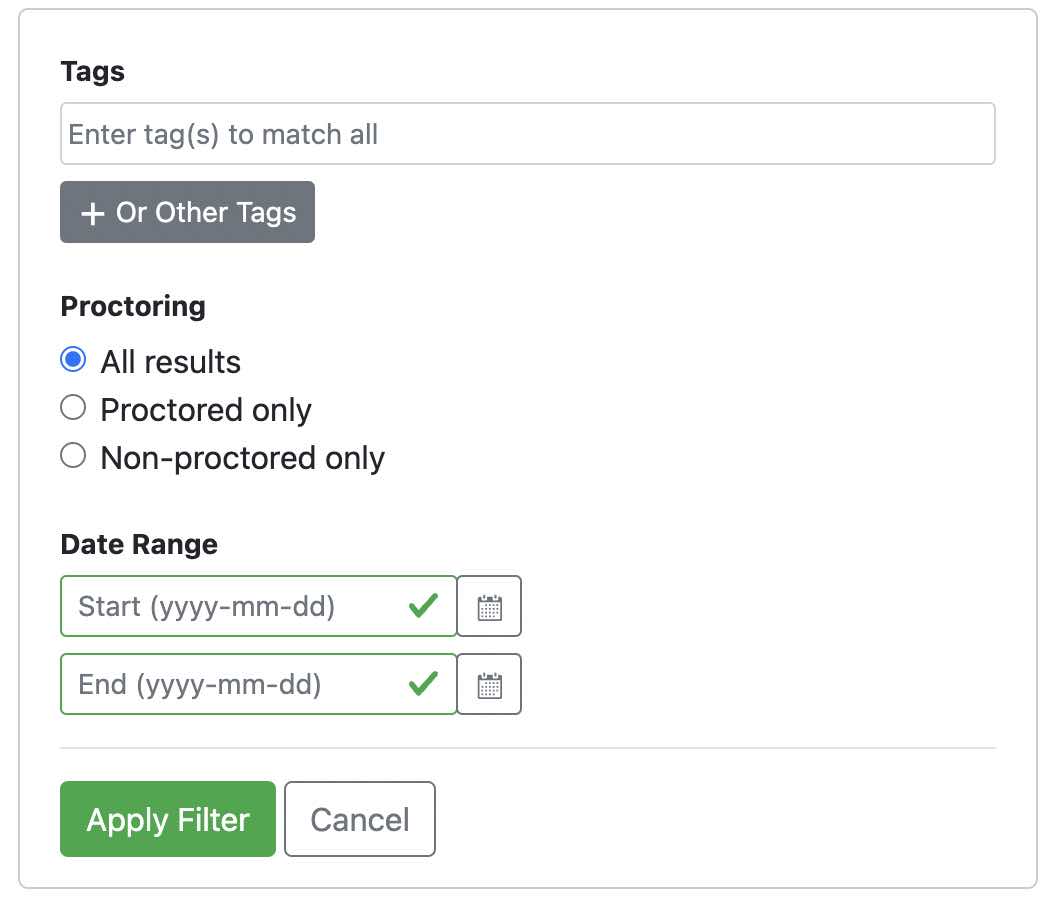
- To create a custom filter, click View All Results, then click Filter Results.
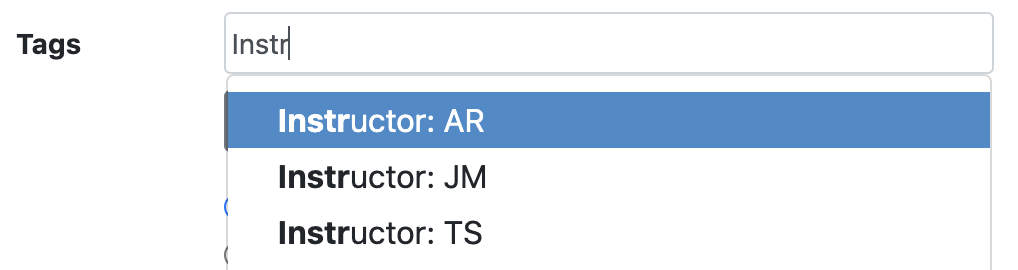
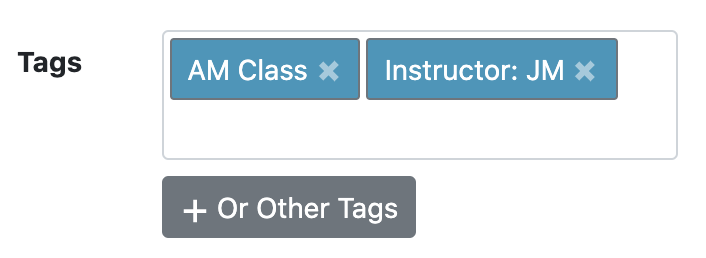
- To filter results by tags, enter the names of the tags. Matching tags will appear in a drop-down menu.
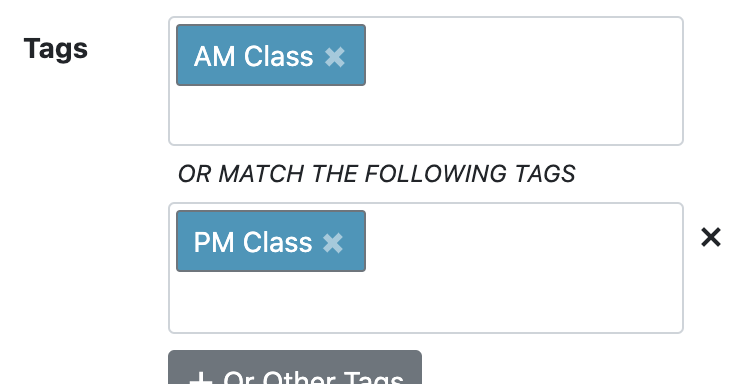
- Note: Entering multiple tags will only filter for assessments that have ALL entered tags. To search for assessments that have one tag or another, click "+ Or Other" Tags.
- After the results have been filtered to the ones you need, you can download the data in a spreadsheet. To Download a CSV file, click the Download CSV button at the top of the screen.
- This button allows you to download the results page into a CSV file that can be opened with Excel or another spreadsheet software.
- It includes only the results included by your current filters.
- Save the CSV file to your computer and then open it to view results.

Watch the process here:
Printing a certificate
In admin portal: Assessments tab
Print a certificate for a single passing assessment result.
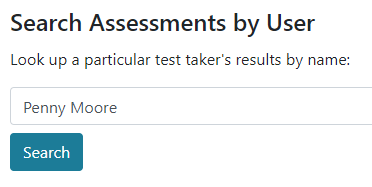
- Find test taker by using the filter options or Search field. Selecting the Proctored-and-Passed Only button ensures that all results are eligible for certificates.
- View the results.

- The results are displayed with most recent records first.
- Only proctored assessments with passing scores of 85% or higher will display a Certificate button on the results page.
- A blue certificate button indicates that no certificate has been printed yet, while a gray certificate button indicates that a certificate has already been printed (but can always be reprinted again).
- Click on the Certificate button to download a PDF certificate.
- Open the downloaded file.
- Print the PDF certificate.
Watch the process here:
Merging certificates
In admin portal: Assessments tab
Merge certificates when a test taker has passed multiple modules that they want displayed together on one certificate.
- Filter for name and Proctored-and-Passed Only. (You can click on this filter option under the View All results button or you can wait until you are viewing the assessment listing page to filter by "Proctored Only" and "Passing Scores Only" in "Filter Results.")
- Click the plus sign for each module you wish to include in the test taker's certificate.
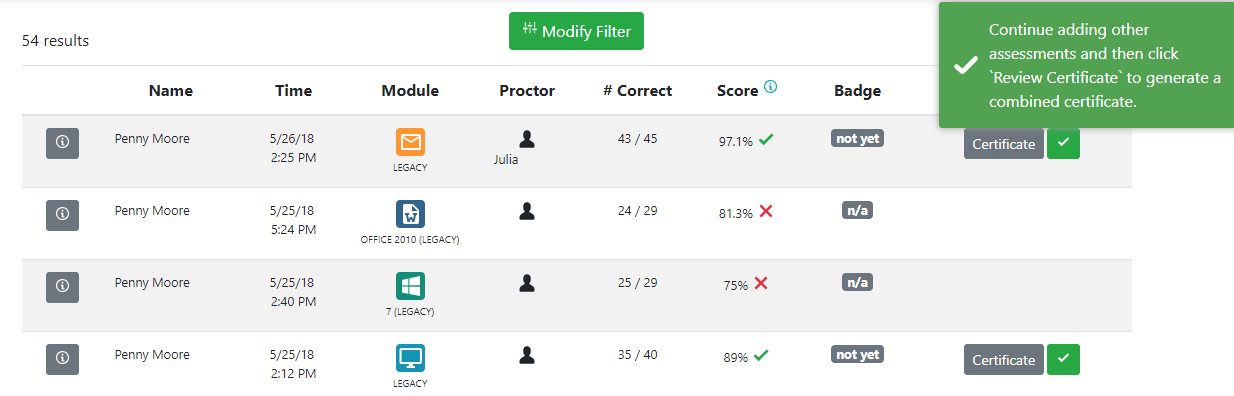
- Click the Review Certificate button at the top.

- Make sure you have chosen the correct assessment results.
- Click Download Certificate.
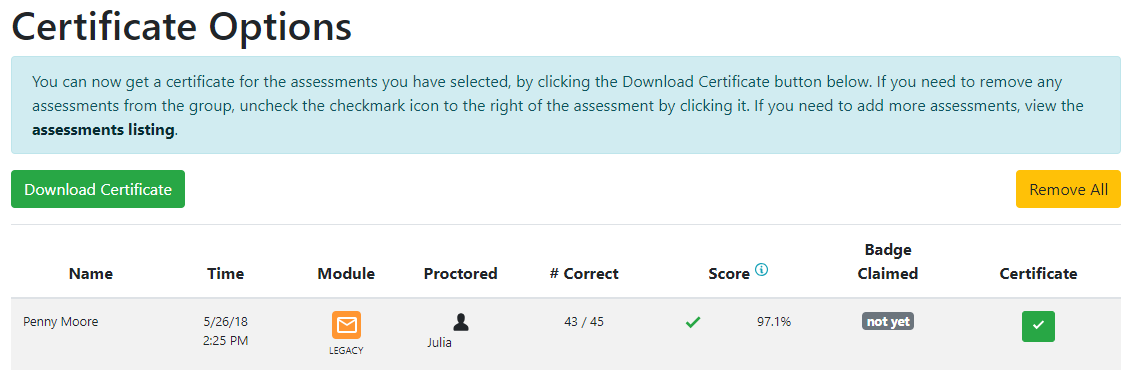
- Open the downloaded file.
- Print the merged PDF certificate.
Watch the process here:
Changing a test taker name
In admin portal: Assessments tab
Change a test taker's name if it includes a typo or if their name has changed.
- In the Assessments tab, filter by test taker name.
- Click anywhere on the assessment result.
- Click Edit in the Name row.

- Change the test taker name and click Save.

Watch the process here:
Changing a test result from your location to proctored
In Admin Portal: Assessments Tab
Change a test taker's result to proctored if it was proctored at your Northstar Location but is not displaying as proctored
- In the Assessments tab, filter by test taker name. (Note: You will only be able to find results from assessments taken at your agency, with the Location PIN entered. If you cannot find the results, you should re-proctor the assessment.)
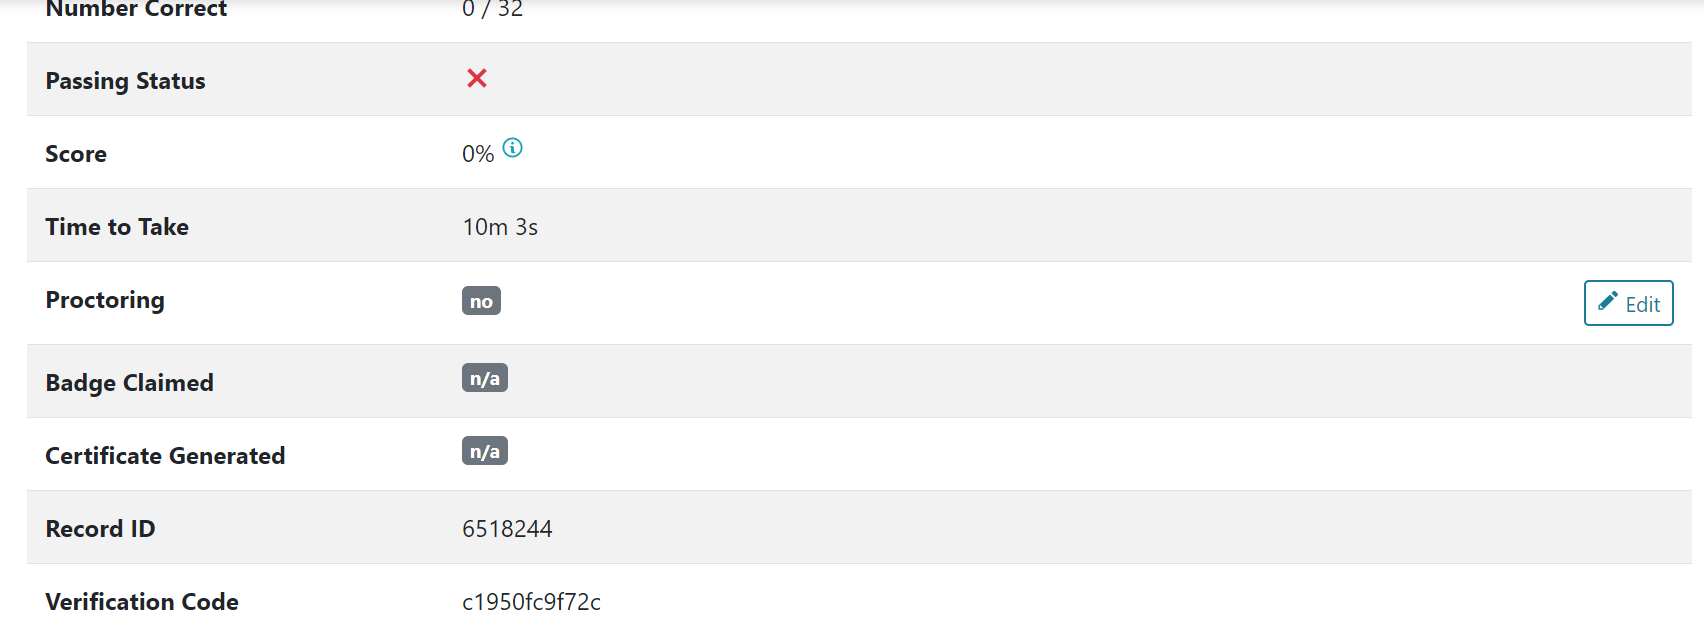
- Click anywhere on the assessment result.
- Click Edit in the Proctoring row.
- Add the proctor's name from the drop down list.
Applying tags to assessment results
In Admin Portal: Assessments Tab
- Click View All Results.
- Click the check box next to an assessment result.
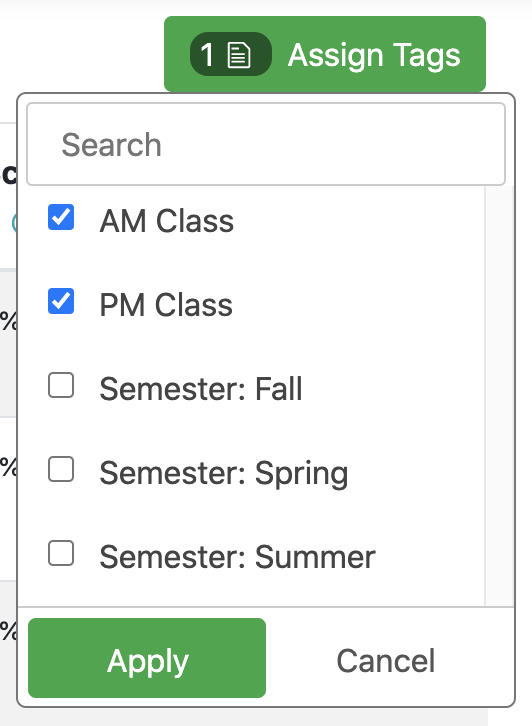
- Click Assign Tags. Select the tags you wish to add and then click Apply.
- To manage tags, click Manage. See also Organizing Learners using Tags.
- You can click on multiple assessments’ check boxes to add/remove tags for several assessments simultaneously. Note: Assessments that are associated with learner accounts will already be tagged with that learner’s tags. For example, if John Doe’s learner account has the AM Class tag, all of his assessments will automatically have an AM Class tag. Also, if you apply a tag to an assessment linked to a learner’s account, that tag will also be applied to all of that learner’s assessments. However, assessments taken without a learner account can be tagged independently of each other.
- Click on the check box at the top to select all results. Click again to un-select all selected assessment results.
Invalidating an assessment result
In admin portal: Assessments tab
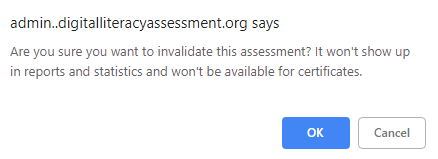
Invalidate an assessment when the test taker has cheated or otherwise violated the test taker code of conduct.
- Find the assessment result you need to invalidate by searching by name or using other filter options.
- Click on the Info icon for the assessment (or anywhere else in the result row).

- Scroll down to status.

- In the status row, click "Invalidate."

- Click Ok.
Watch the process here:
Generating location-wide summary reports
In admin portal: Reports tab
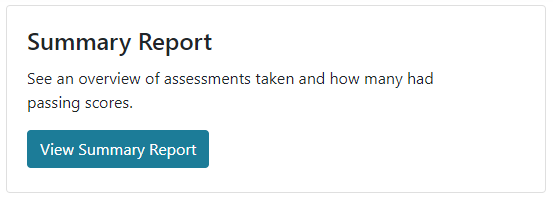
- Click on the View Summary Report button.
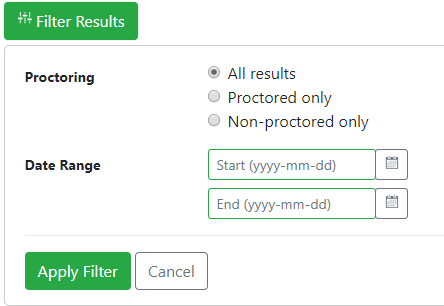
- Click on the Filter Results button and apply filters according to the data you want included in the report.
- If you like, you can print from your computer.
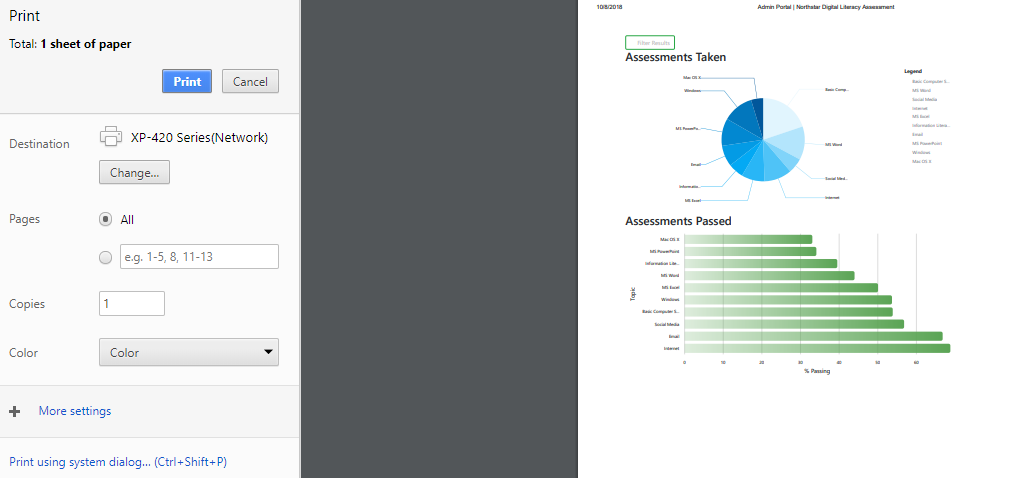
Generating location-wide detailed reports
In admin portal: Reports tab
- Click on the View Detailed Reports button.

- Click on the Filter Results button and apply filters according to the data you want included in the report. See Reports Tab details for more information.
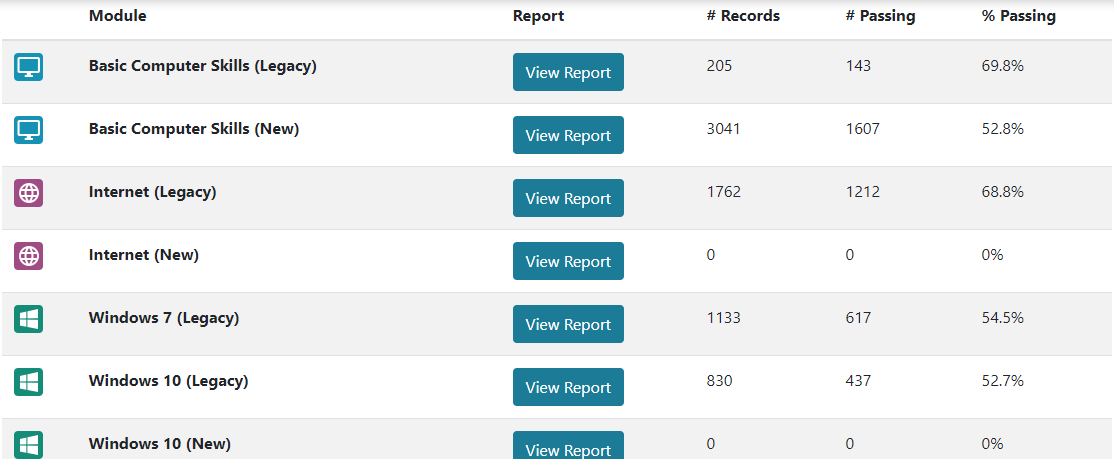
- Print the page to print a comparison of module information with the number of records, number passing, and percentage passing.
Claiming a badge
In admin portal: Assessments tab
Test takers who pass any assessment can claim a digital badge at the time they complete the module. If a test taker passed an assessment through your Northstar location, you can also help them claim a badge later.
- Filter assessment results to find the test taker and specific assessment.
- Click anywhere in the assessment result row.
- Click on View Results Page in the top right corner.
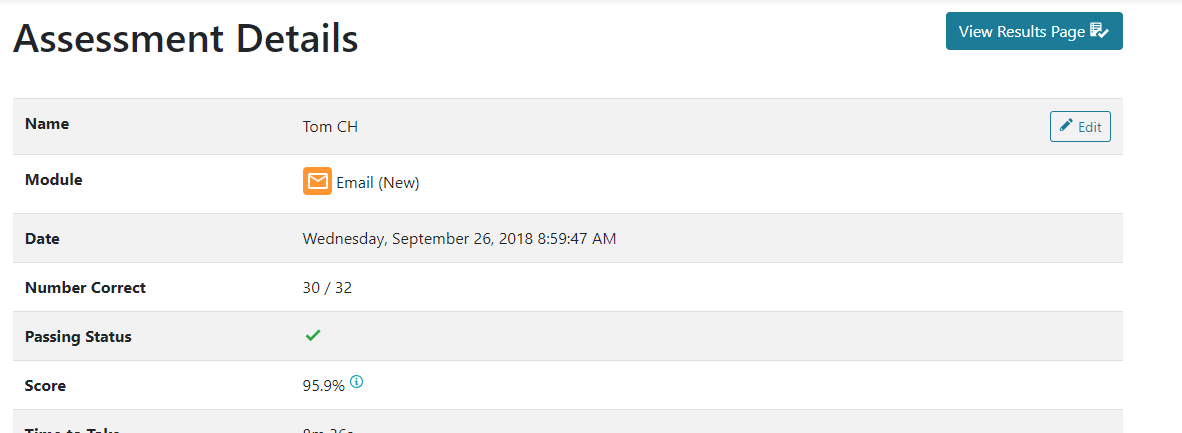
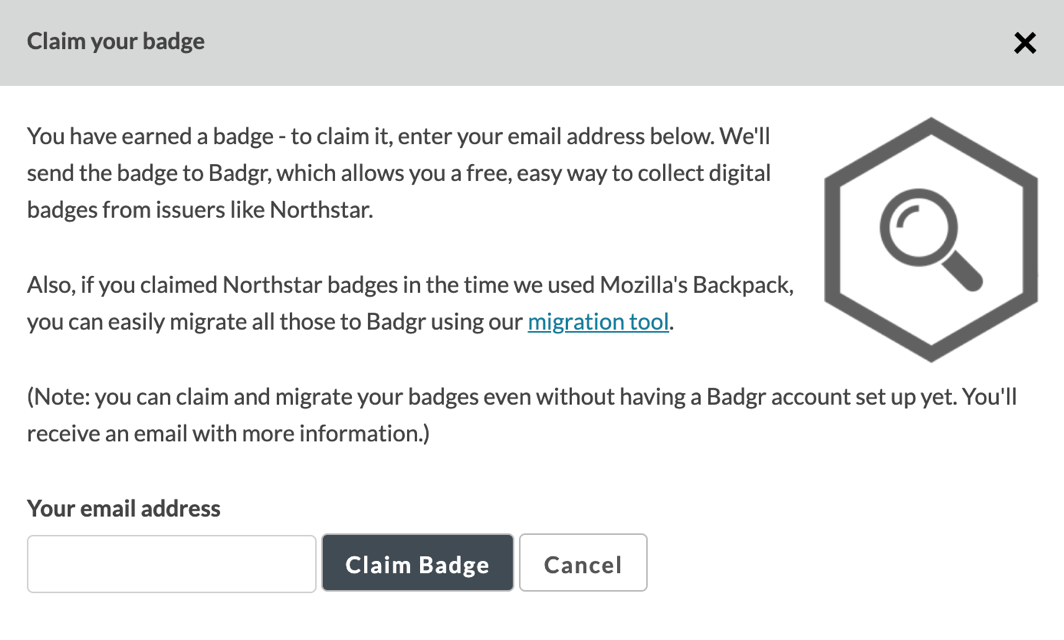
- Click on Claim Badge.
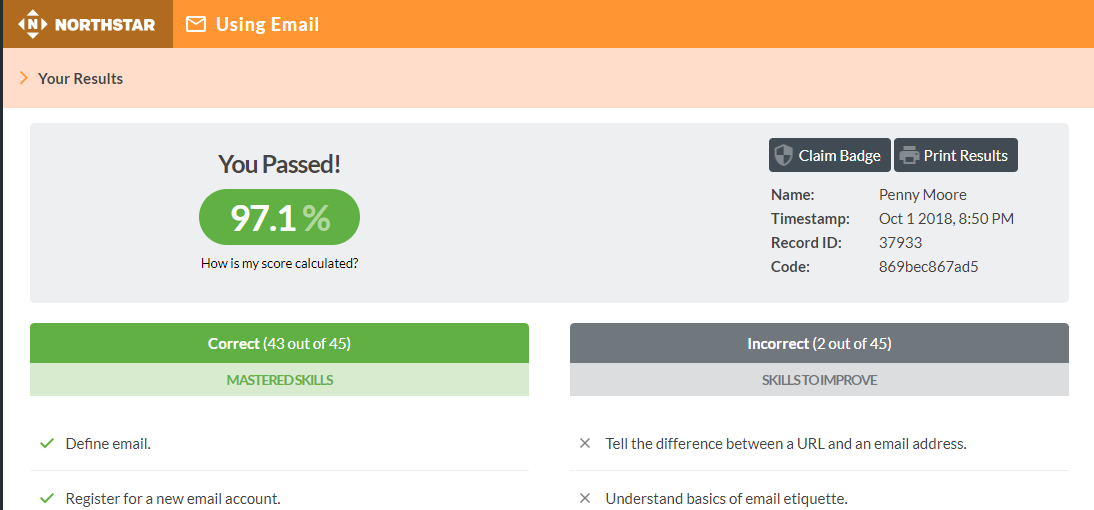
- Follow the directions that appear.
Watch the process here:
Part 3: Using Northstar Online Learning (NSOL) for Staff
Making learner accounts (YouTube video available)
- To make a new learner account, click Invite New Learner.
 Tip: If your Northstar location has an identifier that you typically use for your learners outside of Northstar, you can include that identifier using a special syntax for the Last Name field that includes parentheses and the # symbol. For example, instead of putting "Smith" as the last name, you could put "Smith (#1234)" if the user's identifier is 1234. Identifiers will be visible in the admin portal as well, except are intentionally removed from certificates so that only the learner's name is visible. (Note: we do discourage putting sensitive identifiers into Northstar.)
- Enter the learner’s name, email address, and language preference. You can also optionally apply a tag. They will receive an email invitation to set up their account.
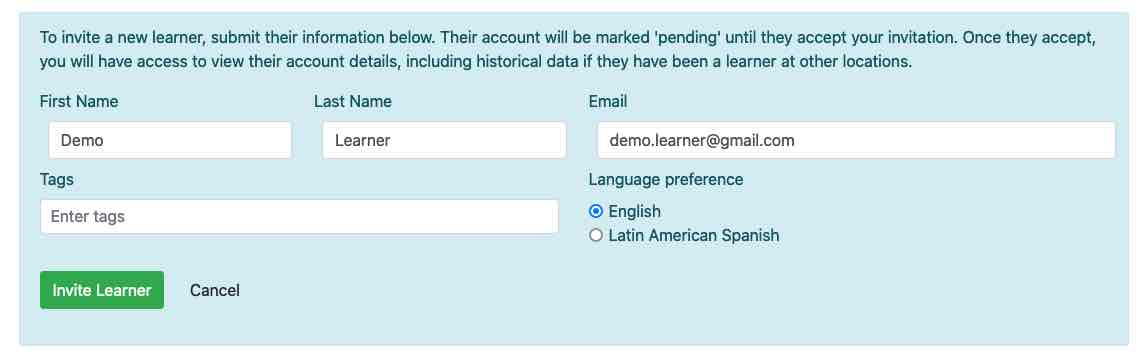
- If learners cannot locate the email, encourage them to check their spam/junk folders. You can also click the envelope button to resend the email.

- If learners still have trouble activating their account, you can manually activate a learner’s account. If the account is still pending, click the lightning bolt. Then, set the learner’s password. Make sure to do this with a learner’s permission.

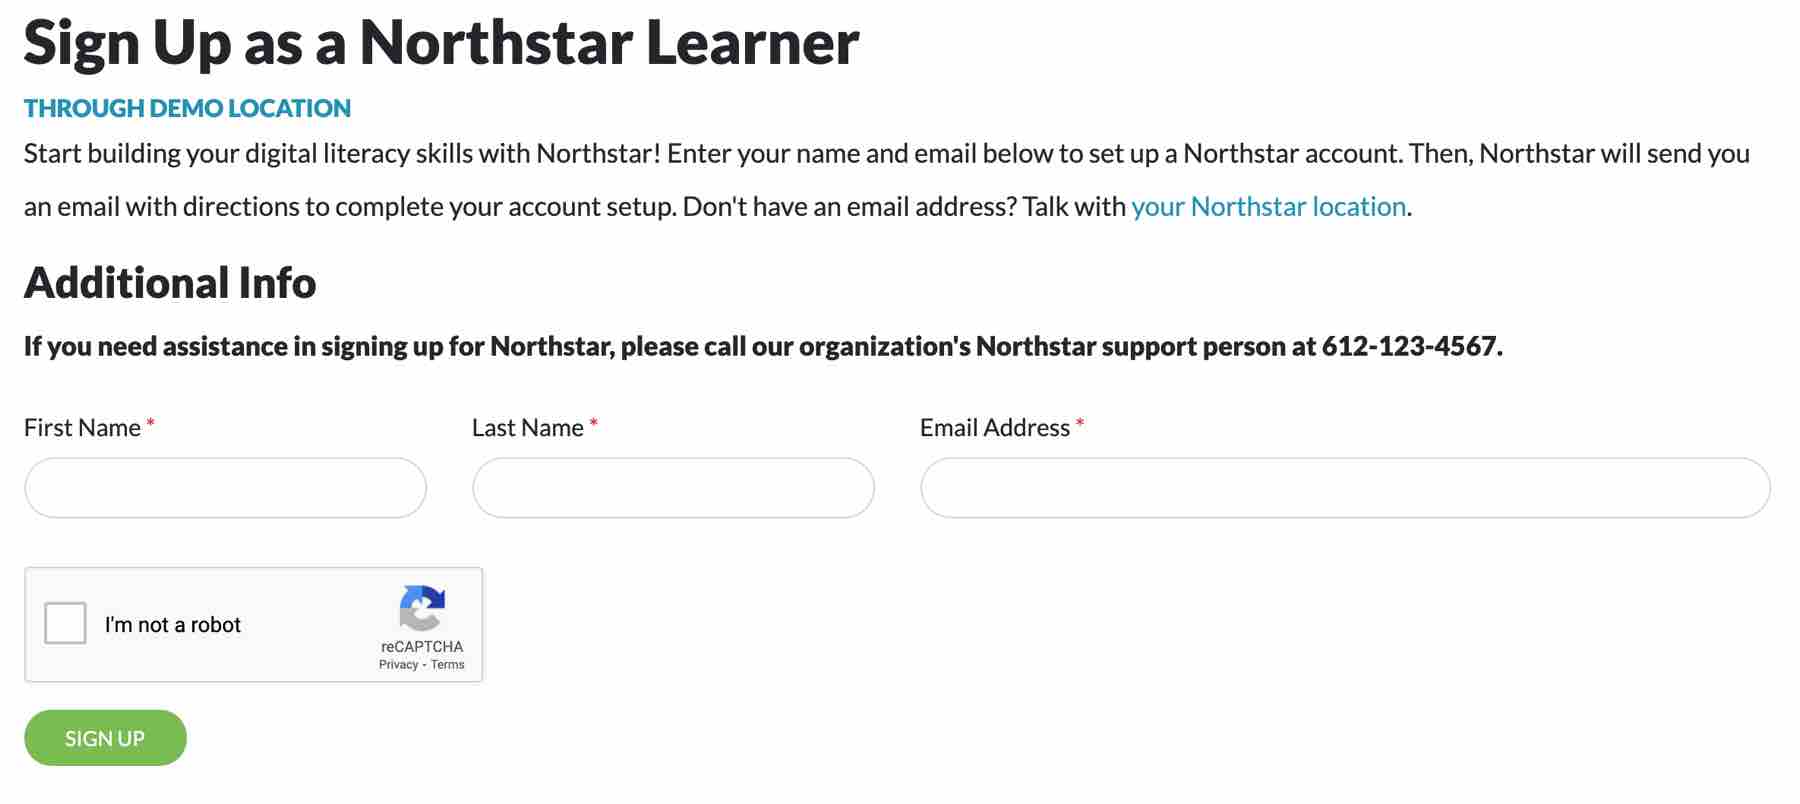
Allowing learners to make their own accounts
- To reduce administrative effort creating learner accounts, admins can allow learners to sign up for their own accounts through your public profile
Tagging learners when they make their own accounts
- If an admin at your location has allowed learners to sign up for their own accounts, you can automatically tag the learners by sending prospective learners a link that will automatically apply a tag to their account upon signing up.
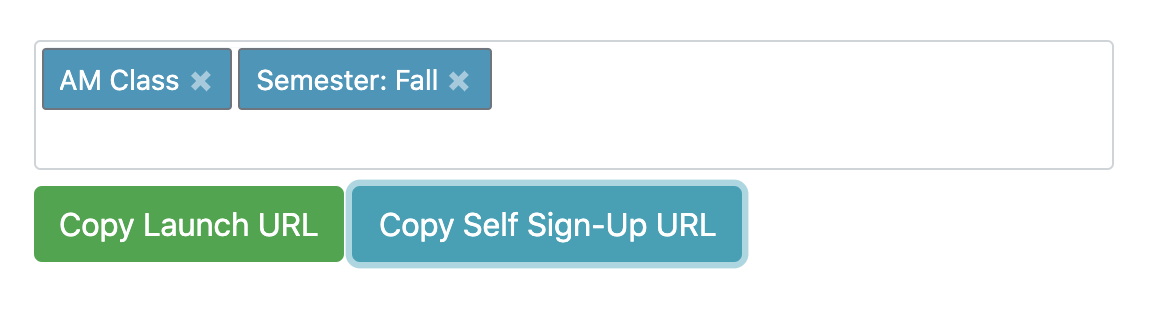
- In the Admin Portal, open the Learners tab and click Manage Tags.
- To the right of a tag, click Copy Self Sign-Up URL.

- Communicate the URL to your prospective learners via email, a paper instruction sheet, etc. That URL will open your self sign-up page. When the person fills out their information to sign up for Northstar, the tag will be applied.
- To create a launch URL with multiple tags, enter the tags in the Multi-Tag Launch URL field at the bottom of the page and click Copy Self Sign-Up URL.
Viewing learner progress and downloading progress reports (YouTube video available)
- Click on View Learners in the Learners tab.
- Each row summarizes a learner and their progress. Click on a column header to sort learners by that category.

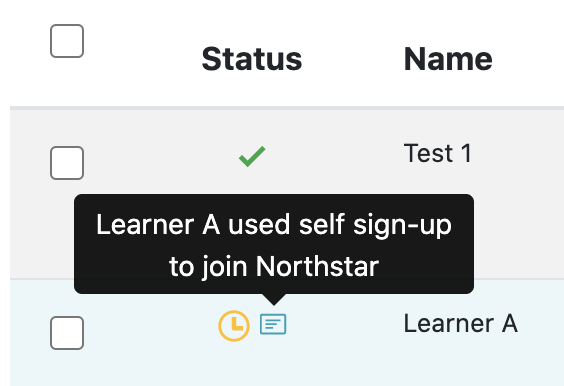
- Status: Hover the status icon to see whether the learner is active, pending (still needs to confirm via email link), or simply bulk-uploaded (email is about to get sent to them). Note that a form icon next to the status icon means the user filled out the self-registration form to join Northstar, allowing you to differentiate users created by staff from those joining by themselves.
- Activity: Hover over each logo to preview learner progress in a Northstar topic.
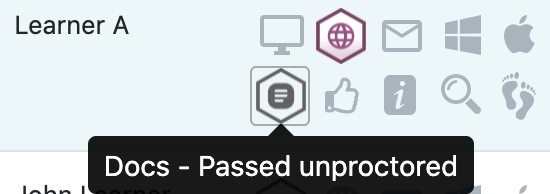
 Click on an icon to show detailed information about that topic.
- Click Download Activity to download a spreadsheet of progress for all active learners.
- Note: this spreadsheet does not include data on how much time learners spend on NSOL. For a guide on how to download reports on usage amounts, please see Viewing and downloading usage reports.
- Click Filter Results at the top to search for specific learners. You can also filter learners by tags.

- Note: Entering multiple tags in the search field will only search for learners who have all of those tags. To search for learners who have either one or another tag, click "+ Other Tags" button to add more options.
- Click on a learner’s name to see a detailed summary of their progress in NSOL. You can then click on a particular topic to see the most recent assessment result and whether the learner has practiced the necessary skills to improve their results.
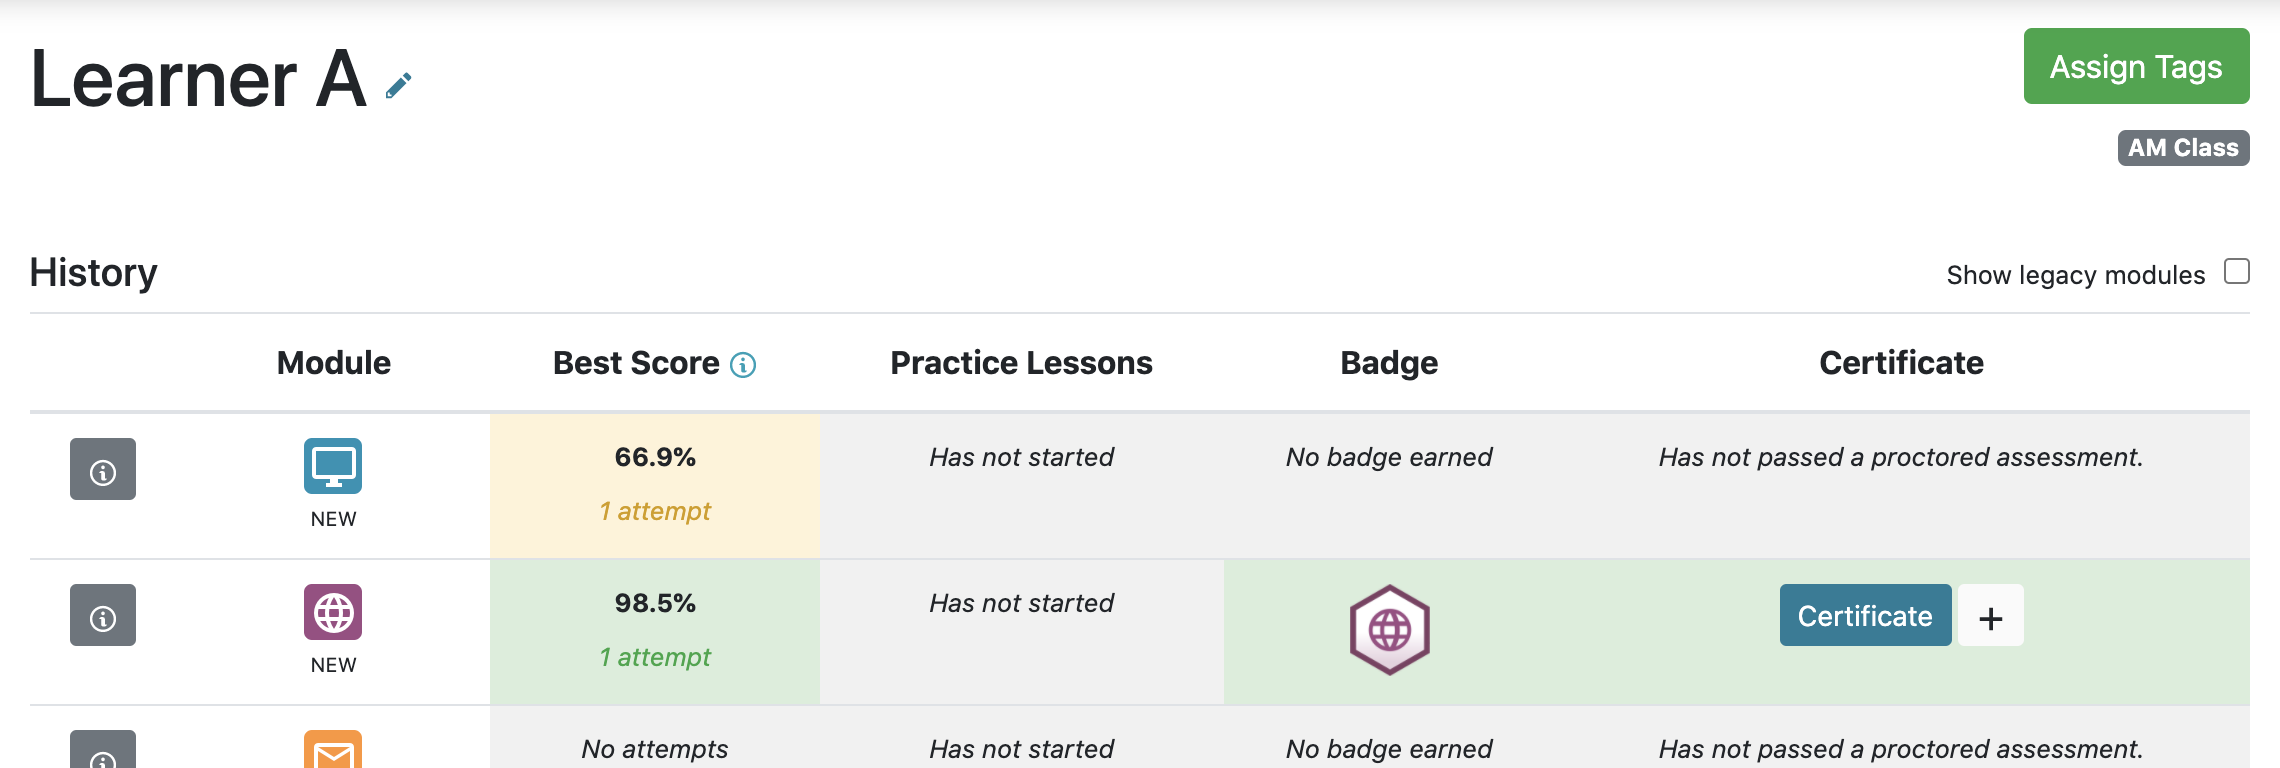
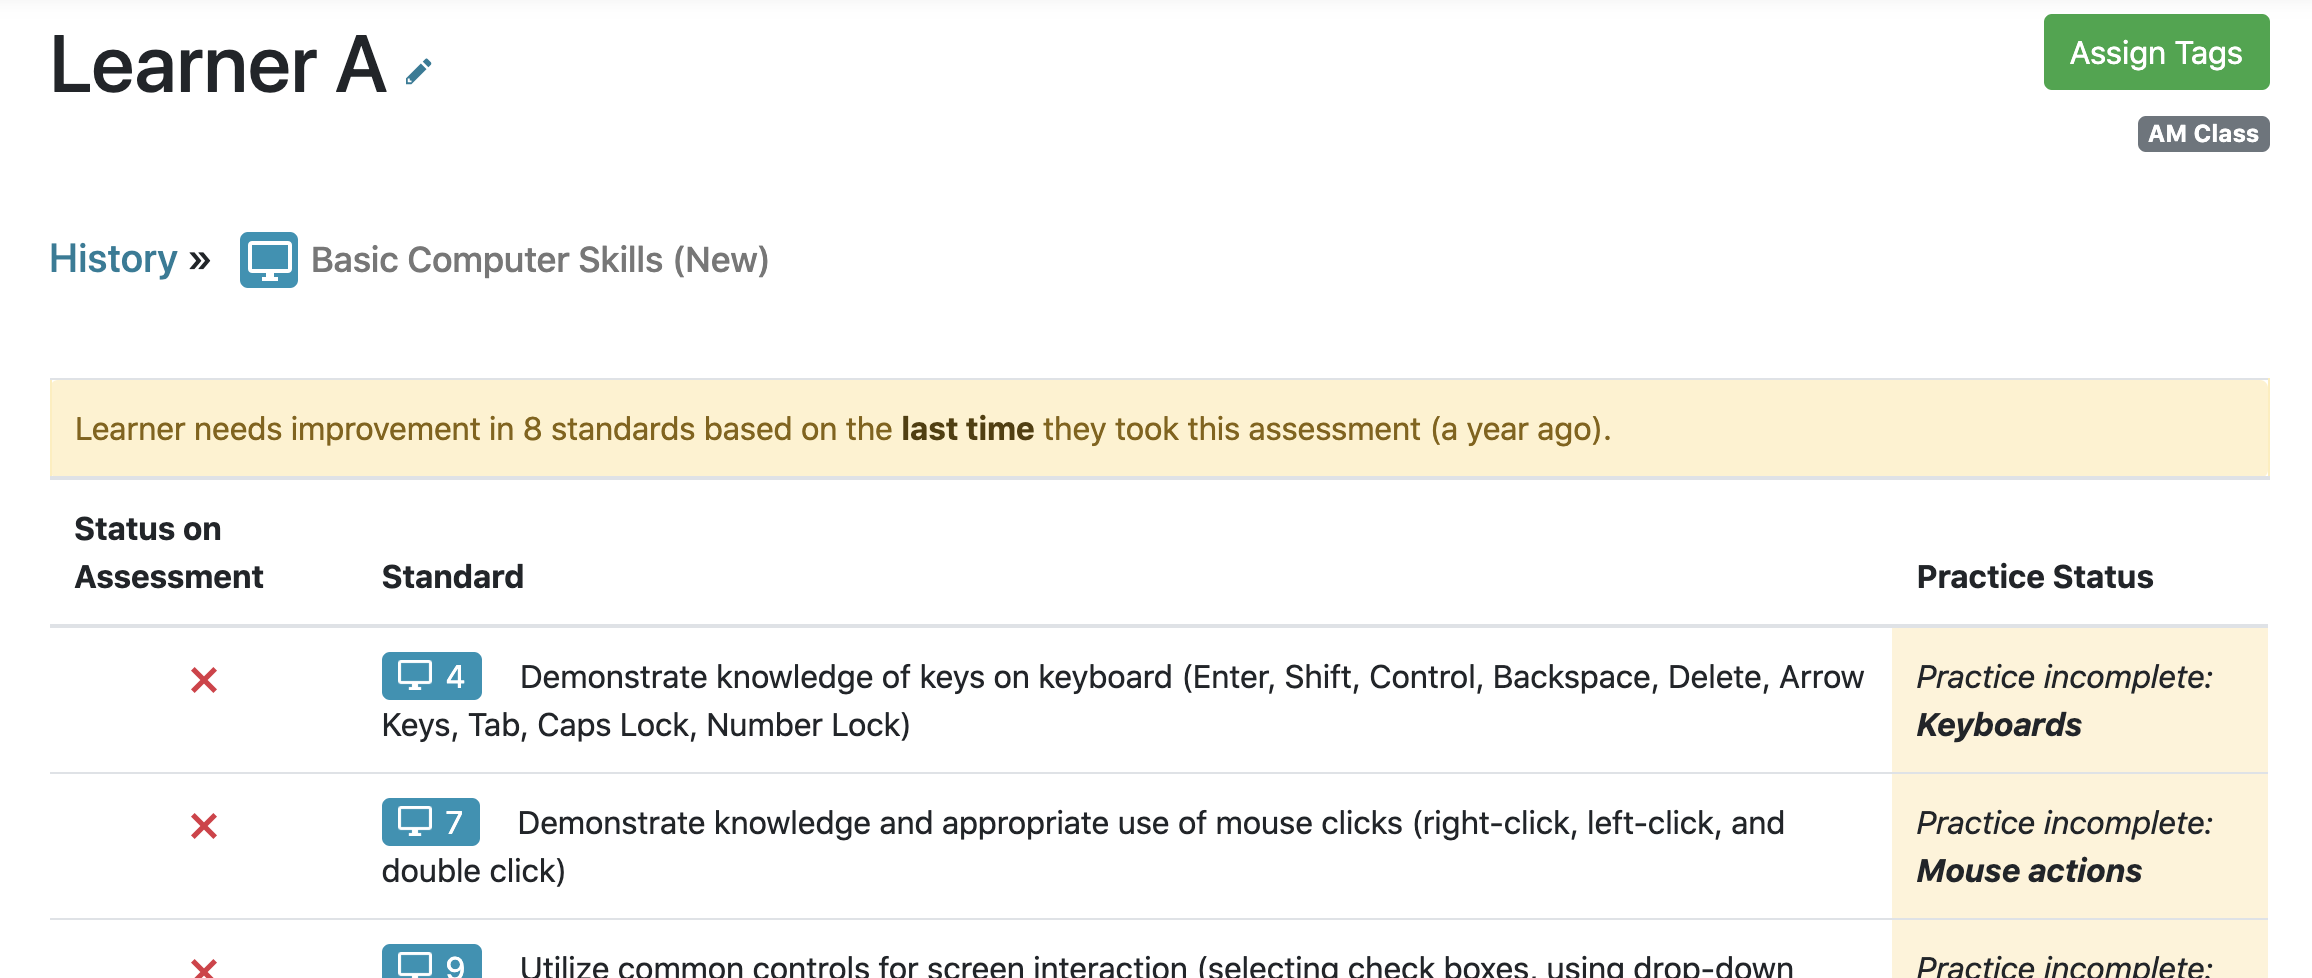
- Click anywhere in a Module row to view the learner's last assessment results, including standards mastered and standards needing improvement. This view also shows whether the learner completed the practice lesson that corresponds to each standard.
Editing learner accounts
- Click the Pencil icon next to a learner’s name to make corrections to their name, email, password, or language preference.

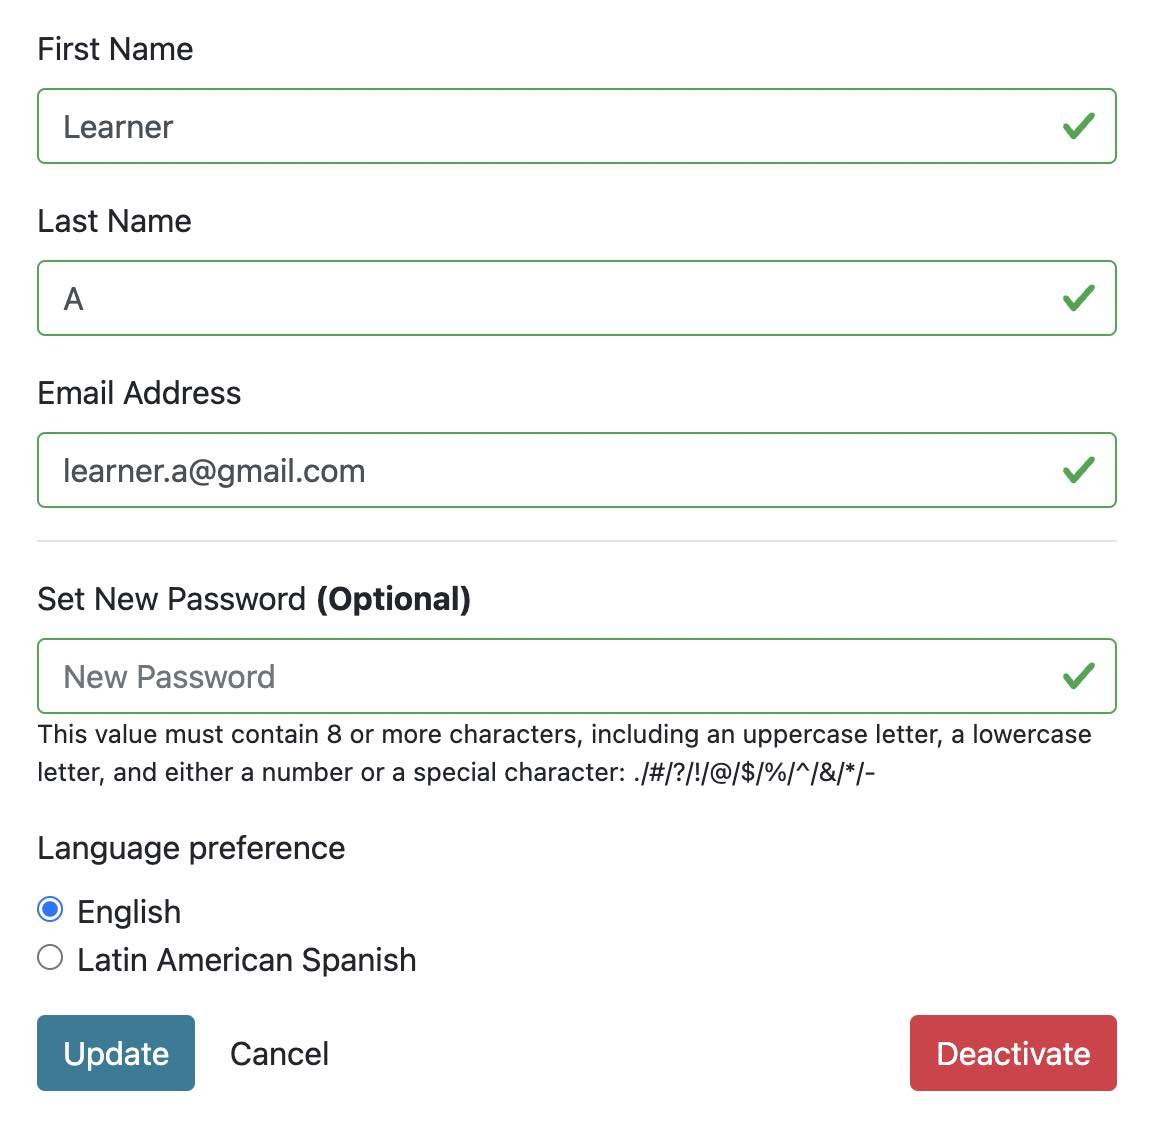
- Make sure to get permission from a learner to make changes, especially when changing their password. If you change a learner’s password, they will receive email notification that their password has been changed by you, but you will have to tell them the new password.
Deactivating learner accounts

- In the Learners tab, find a learner’s account by scrolling through the list or by searching using the Filter Results button. Tip: You can click on the header for the Status column so that deactivated learners appear at the top of the list.
- Click the Pencil icon in the Actions column.
- Scroll down and click Deactivate.
Reactivating learner accounts
- In the Learners tab, find a deactivated learner’s account by scrolling through the list or by searching using the Filter Results button.
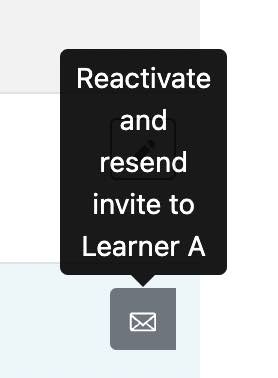
- In the Actions column, click the Envelope icon to reactivate and resend a learner invitation.
- The learner will need to find and accept the email invitation to reactivate their account.
Organizing learners using tags
- Tags can be created to assign learners to a specific class, teacher, or group. They can also be used to track demographic data. Learners can be assigned multiple tags. Sensitive personal information, such as social security numbers, should never be used for tags.
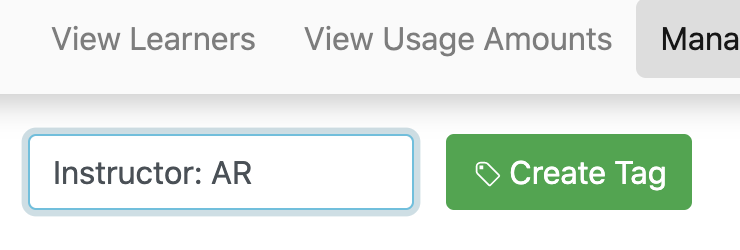
- Click Manage Tags in the Learners tab

- In the “Enter tag name” field, type the name of a tag and then click Create Tag
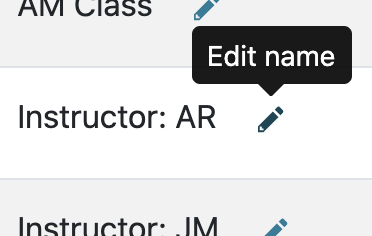
- You can edit tag names by clicking the pencil icon next to a tag
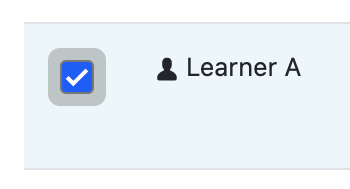
- To apply a tag to a learner, first click the check box next to a learner’s name.
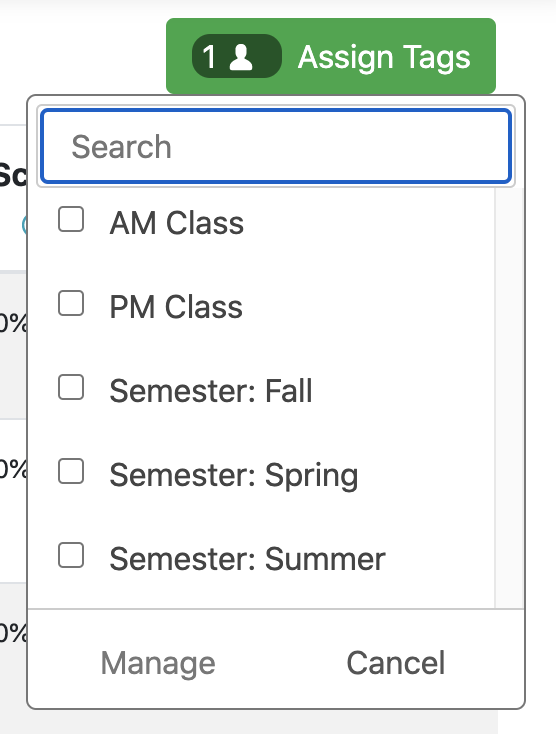
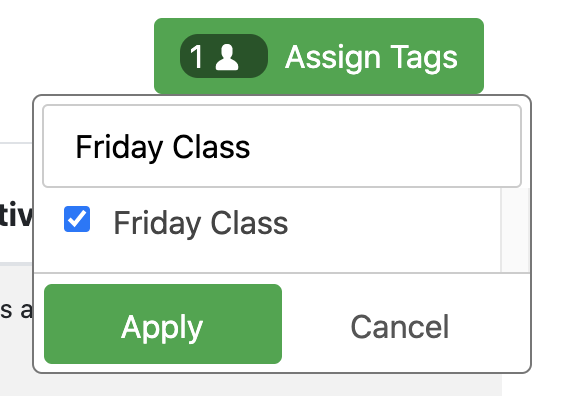
- Then, click Assign Tags to open a menu to select tags to apply.
- You can search for a tag by typing to the search field. As you type, if a tag does not already exist, click Create New to create and select the new tag.

- Click Apply to save the tagging changes.
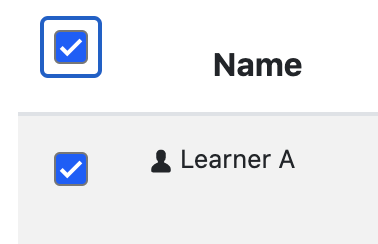
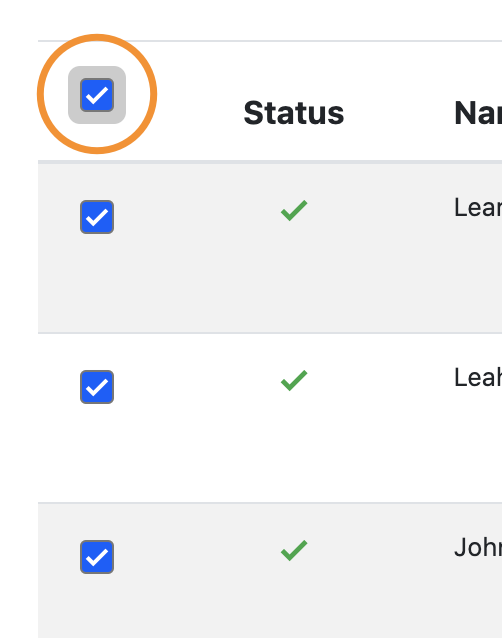
- You can add/remove tags for multiple learners simultaneously by clicking the check box next to each learner’s name. To select all learners, click the check box at the top. To unselect all learners, click the check box at the top a second time.
- Archiving tags - in the Manage Tags page, if you no longer want to use a tag at your location, click the Folder icon next to it to archive it. After archiving, that tag will no longer appear in menus, but the assessments and learner accounts that you have associated it with, will continue retaining the data.

Collecting distance-learning data by learner location
- Some Northstar locations track data on the amount of time learners spend on NSOL away from their Northstar location (distance learning hours).
- To change this feature's setting, click Location Info in the Admin Portal and then click Edit Location Info.

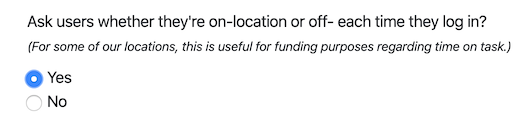
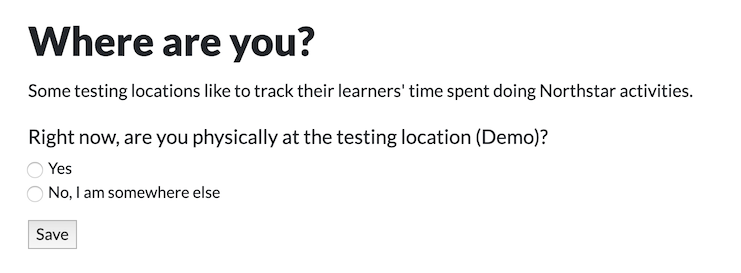
- Then, answer the question “Ask users whether they’re on-location or off- each time they log in?”
- If you select Yes, learners will be prompted to indicate their location every time they log in.
- If you select No, learners will not be prompted to indicate their location and all time will be logged under Unknown Location in your usage reports.
- Save your changes
Viewing and downloading usage reports (YouTube video available)
- In the Learners tab, click View Usage Amounts to see how much time learners spent using NSOL At Your Location and Away from Your Location.
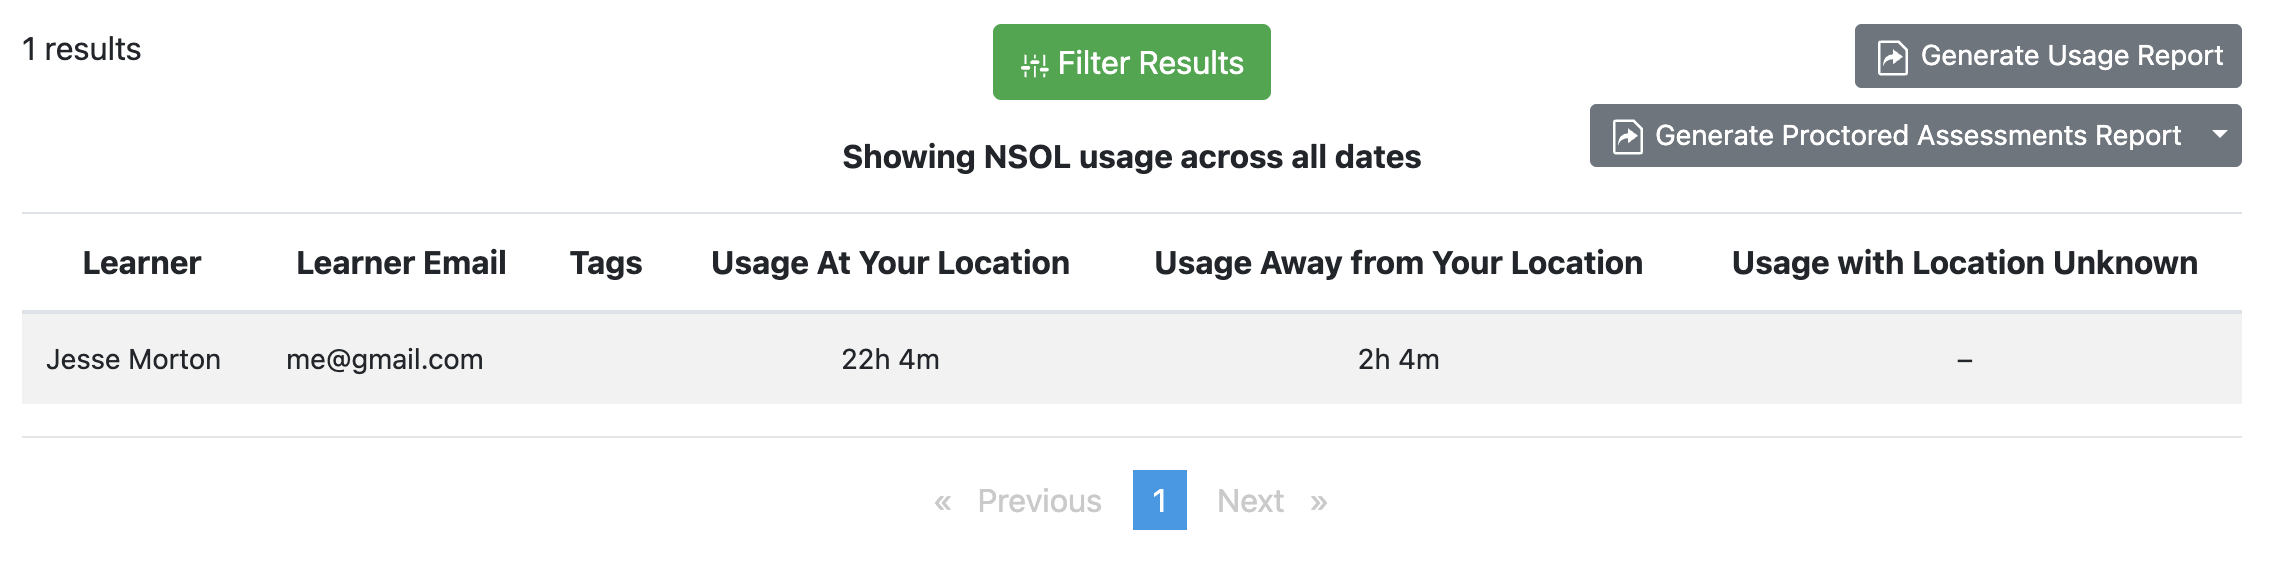
- Note: If your site does not ask learners their location, all hours will be displayed under the column Usage with Location Unknown.
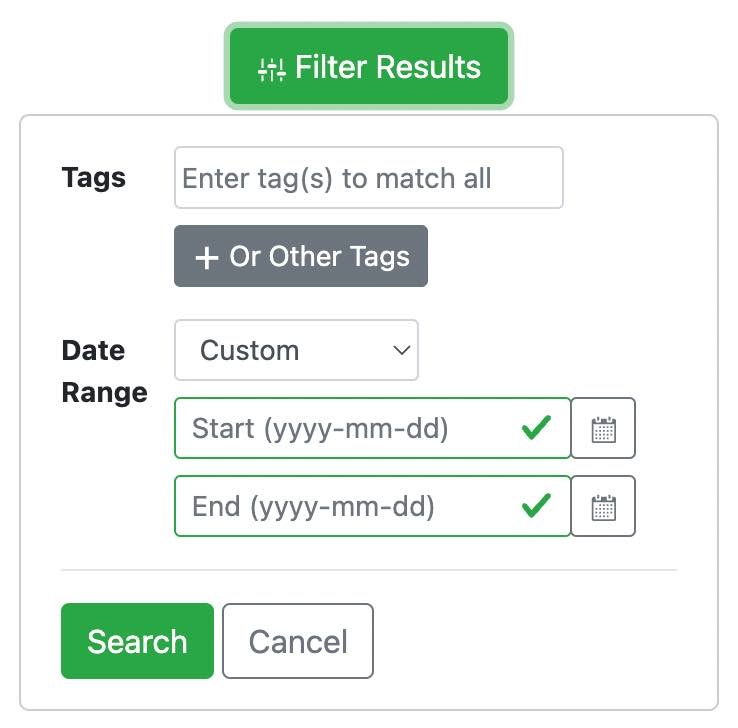
- Click Filter Results to limit the output by date or by tags.
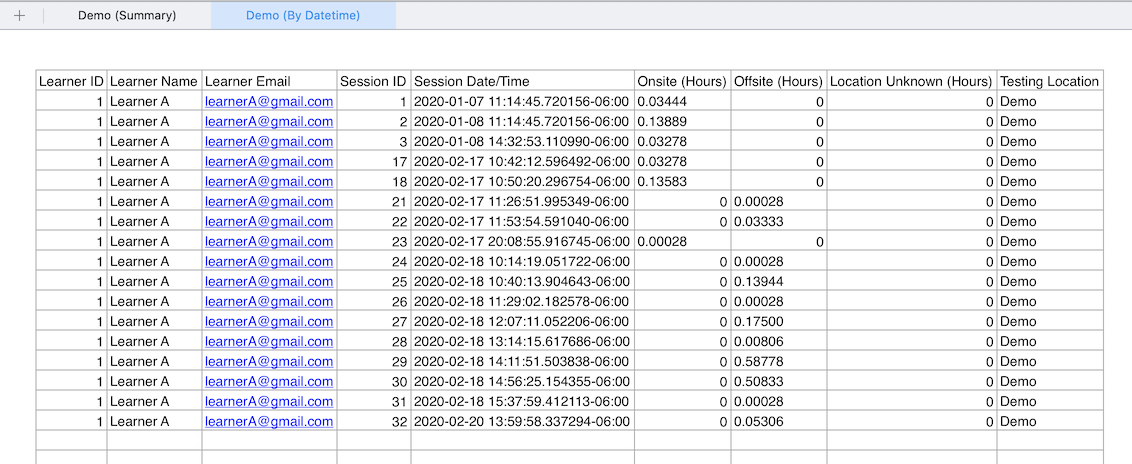
- When you have the data you need, you can download an Excel spreadsheet file to sort, format, and save it.
- The spreadsheet has two different tabs. The Summary tab shows each learner’s total time for the date range you selected. The By Datetime tab shows the time for each usage session separately.

Exploring Northstar Online Learning
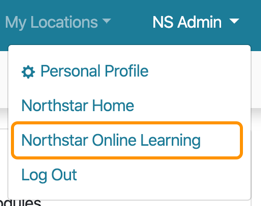
- New Northstar staff accounts automatically include access to NSOL. To view NSOL as a learner, click your name at the top right and select Northstar Online Learning.
- If you are unable to access NSOL from the admin portal, please talk to your location’s Northstar Admin(s) about enabling NSOL access on your account.
Part 4: Using Northstar Online Learning for Learners
Setting up an account
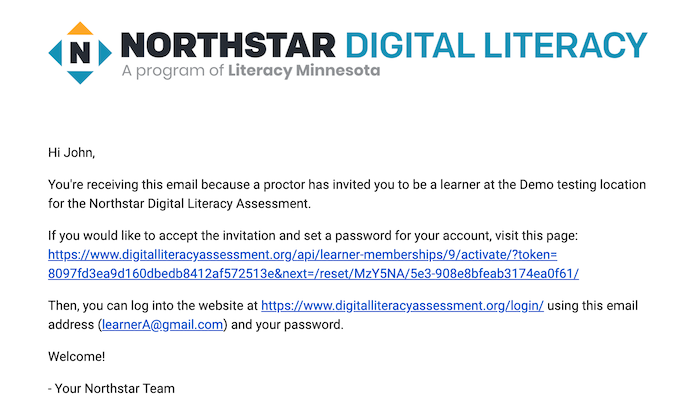
- Check your email for an invitation to Northstar Online Learning.
- Click the link to confirm your learner membership with the Northstar location, and make a password.
- If you cannot find the invitation, check your spam/junk folder.
Logging into your account
- On the Northstar homepage, click the Log In button in the upper-right corner.
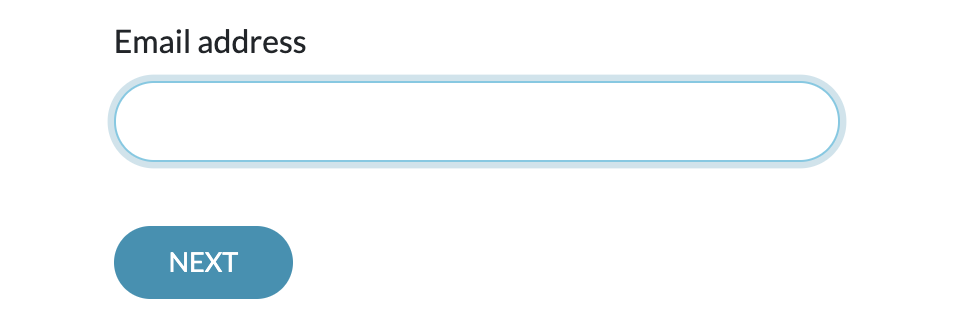
- Enter your email address and password and click Log In.
- The site may ask if you are at your learning location or away from your learning location. Some locations use this data to get funding for their programs.
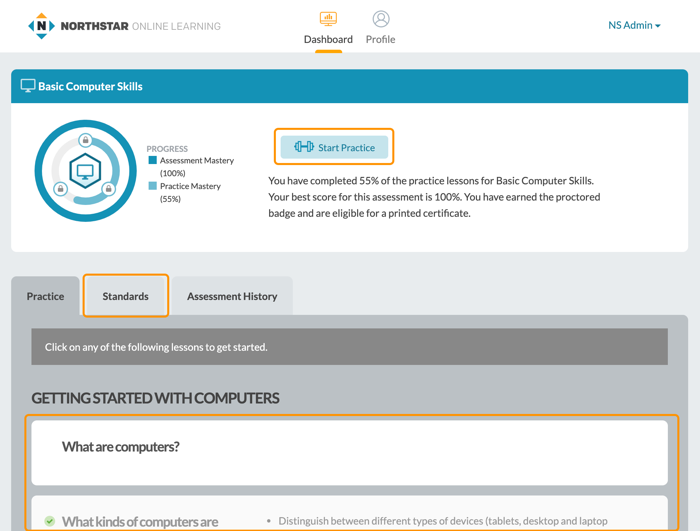
Dashboard
- When you log in, you will see the Dashboard.
- The Dashboard shows the results of the assessments you’ve taken and your progress on the learning and practice for each topic.
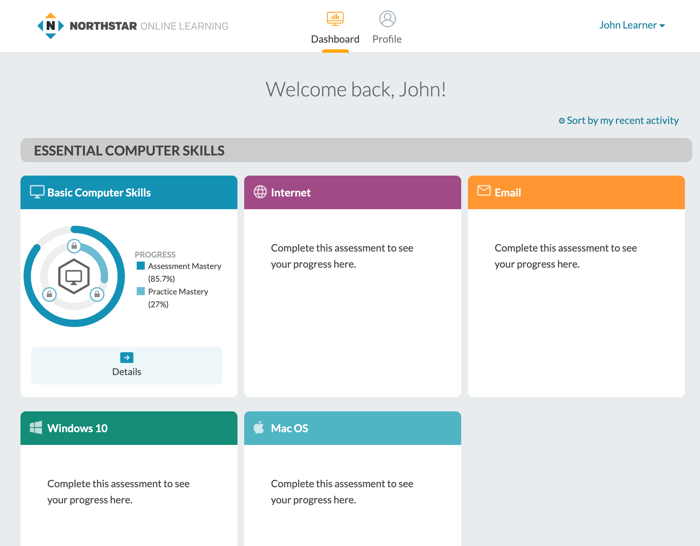
- The lock icons in the learning and practice progress ring indicate the status of each section’s review questions.
- Locked means you haven’t finished the practice yet.

- Unlocked means the review questions are available.

- Checkmark means the review questions are complete.

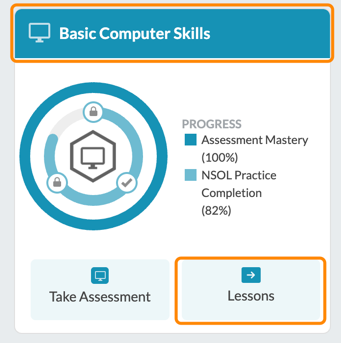
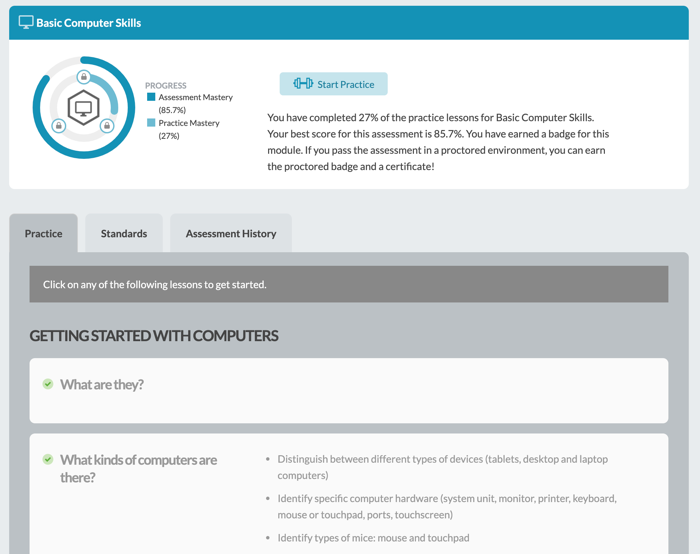
Viewing module progress
- Click on Details or the module name to see more information about your progress.
- The Practice tab below shows a list of lessons and the standards they cover. A checkmark means you’ve finished the lesson.
- The Standards tab shows your mastery of each standard, as of the last time you took the assessment.

- A red X means you got at least one question about that standard wrong.
- A green checkmark means you got the assessment question(s) for that standard correct.
- On the right, the Practice column shows whether you completed the relevant practice lesson.
- If you have not finished the practice lesson, you can click the Practice button to start practicing.
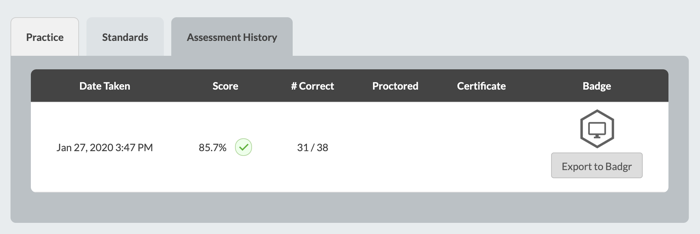
- The Assessment History tab shows your assessment history, including certificates and badges you’ve earned. Click anywhere in a row to see your result page for that assessment.
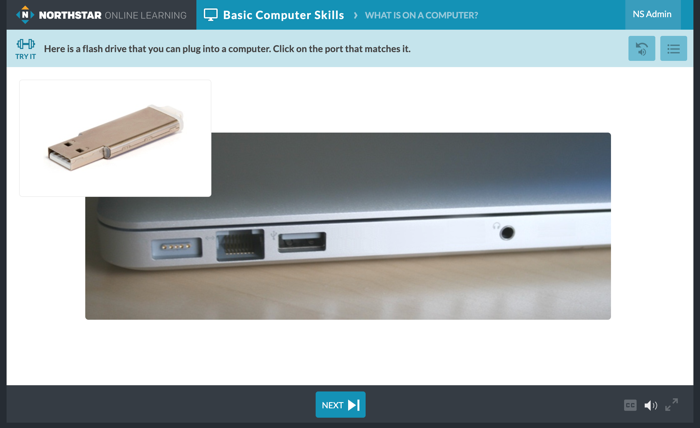
Using practice mode
- To start practicing, click Start Practice on the top of the page. You can also click on lessons in the Practice tab or the Practice buttons in the Standards tab.
- Each lesson has something to read, to watch, or to do.
- The Next button at the bottom goes to the next screen.
- The language button changes the language.

- CC turns on text for the audio.

- The audio button turns sound on or off.

- The expand button makes the content fill the screen.

- If you need to go back, click the back button in your browser.
- The rewind button starts the audio again and lets you change the audio speed.
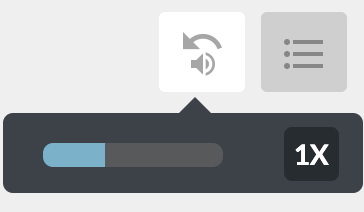
- The menu button opens a navigation menu to go to different sections of the module.

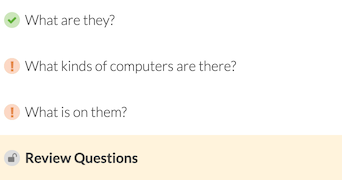
- A green checkmark means that lesson is complete.

- When you have completed all of the lessons in a section, the Review Questions unlock.
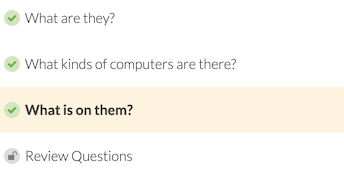
- If you get a Review Question wrong, an alert icon will appear next to the lesson you can review it to help learn that content. After you are confident in the material, you can retry the Review Questions to complete the section.
- To go back to the Dashboard, click the Northstar Online Learning logo at the top of the screen.
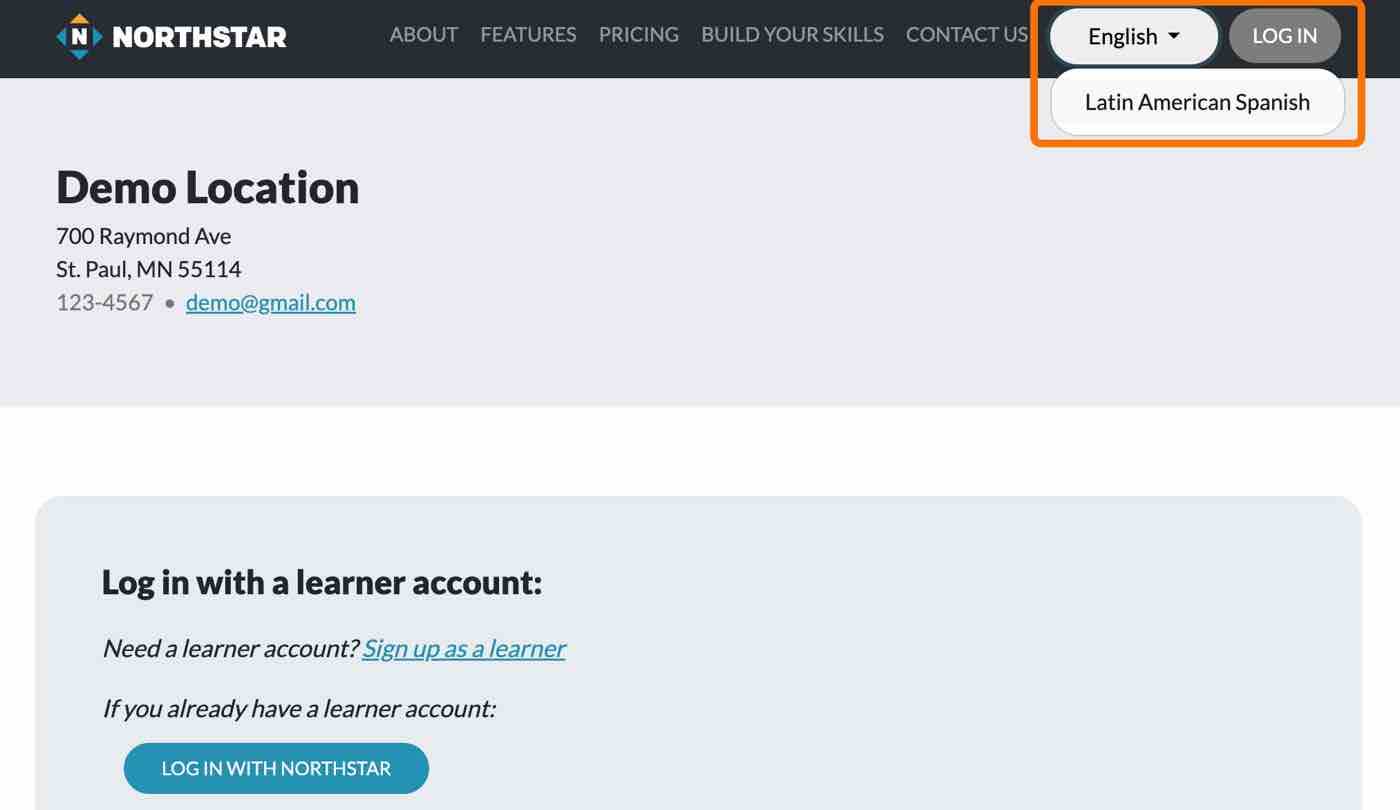
Changing language preferences
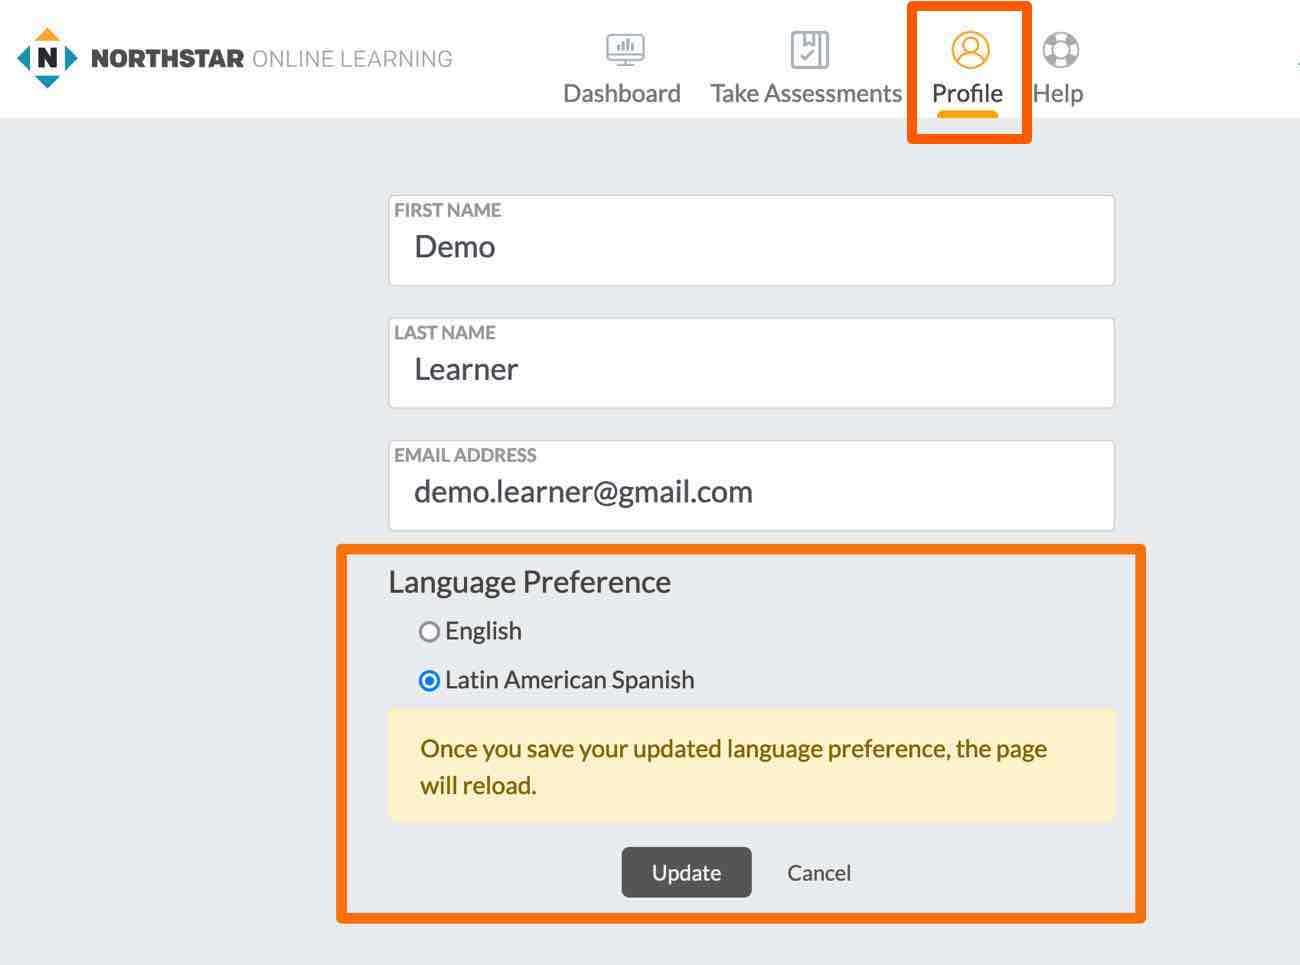
- Click Profile at the top of the Dashboard.
- At the bottom, select a language and click Update.
- Note: some modules might not be available in other languages.
Part 5: Using Northstar for Administrators
Editing Northstar location information
In admin portal: Location Info tab
- Click Edit Location Info.
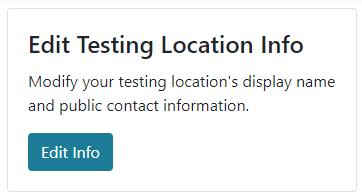
- Make any needed changes.
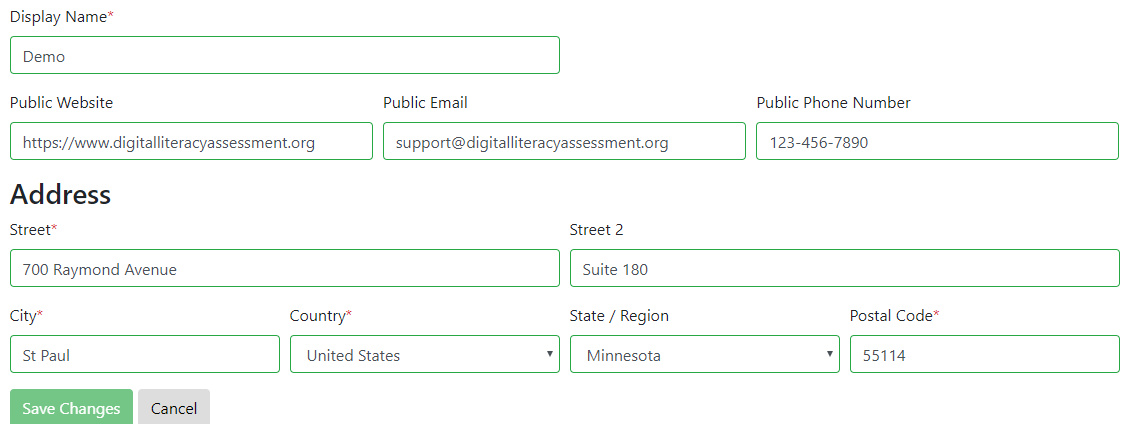
- Click Save Changes.
Allowing learners to make their own accounts
In admin portal: Location Info tab
- Click Edit Location Info
- Under the Profile Page Info section heading, ensure the checkbox is clicked that your location is offering NSOL learner accounts.

- Also ensure the checkbox, "Allow users to create their own NSOL learner accounts," is checked.

- Provide a contact email for learners in case they reply to their confirmation email, or in case they need to contact someone for support in the process.

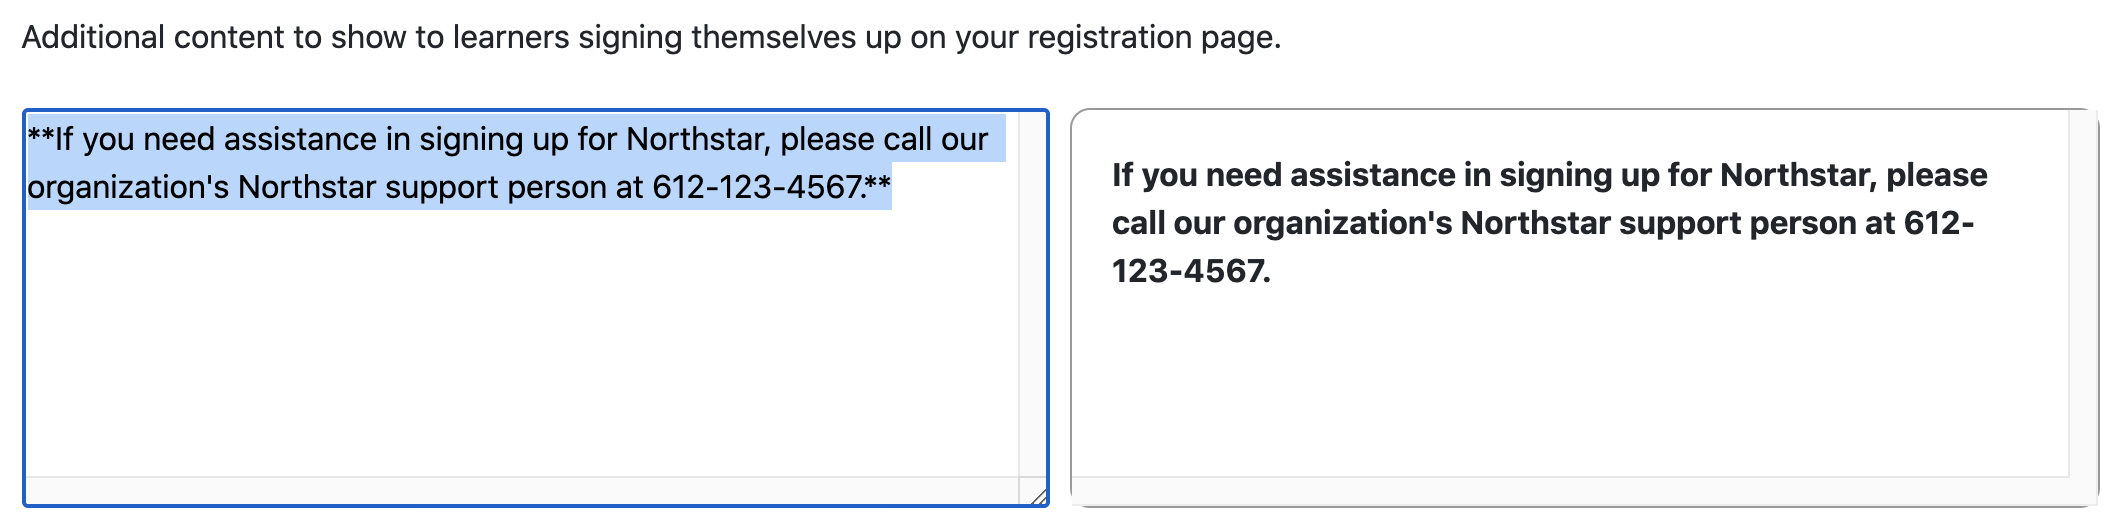
- Optionally provide additional information in Markdown formatting that may be important to communicate to your learners to successfully understand the sign-up process at your location.
- Click Save Changes.
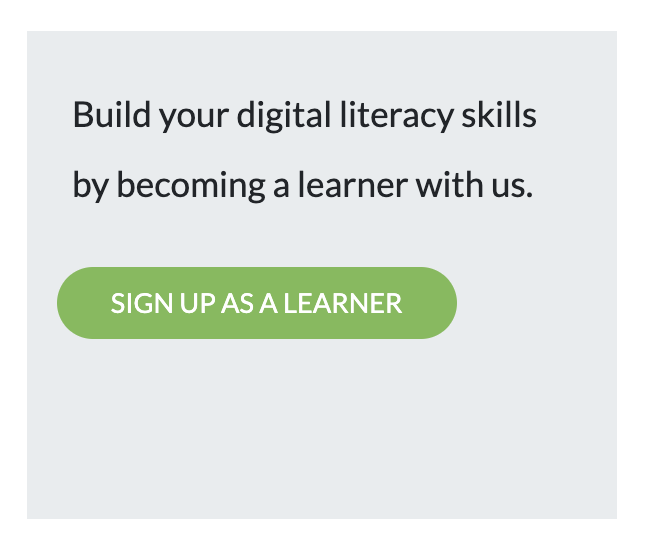
- Now when people view your public profile from our Locations map, they will have the ability to click to register.
Managing staff
In admin portal: Location Info tab
- Click Manage Staff.
- Click Add New Staff Member.
- Fill in the fields with their first name, last name, and email address and click Create Staff Member.

- Staff members will receive an email invitation to set up the password for their account.
- If they cannot find the email invitation, encourage staff members to check their junk/spam folders.
- If staff members still cannot find the email invitation, make sure their email address is spelled correctly. If it is incorrect, deactivate the account (see below) and create a new invitation.
- For more assistance creating staff accounts, please contact us.
- To enable optional staff privileges, click on the toggles next to a staff member’s name. Blue toggles indicate active staff privileges for that position.
 Descriptions:
- Admin Portal Access: All active staff can access basic parts of the admin portal, including assessment data, Northstar Online Learning (NSOL) accounts, and the curriculum
- Proctor: Proctors can proctor assessments in order to issue certificates
- Proctors will need to complete proctor training before proctoring assessments. The toggle will indicate if they still need to complete training.
- Admin: Admins can manage staff, location info, and billing. Note: each site is limited to 3 admins to limit the number of people who can make major changes to the account. We encourage sites to have at least two admins, though, in case of staffing changes. If you need to add more than 3 admins to your account, please contact us.
- NSOL Access: Allows access to Northstar Online Learning (NSOL) to view content as a learner
- All staff members are granted Admin Portal access and NSOL access when a new account is created.
- To deactivate a staff member, turn off the toggle under Admin Portal Access. This will deactivate their other privileges. Staff account information is not deleted, so you can always reactivate a staff member’s account or privileges later with no changes to their account information. Note: If staff members use their account at multiple locations, deactivating their account at one location does not affect their access at their other locations.
Watch the process here:
Editing billing information
In admin portal: Location Info tab
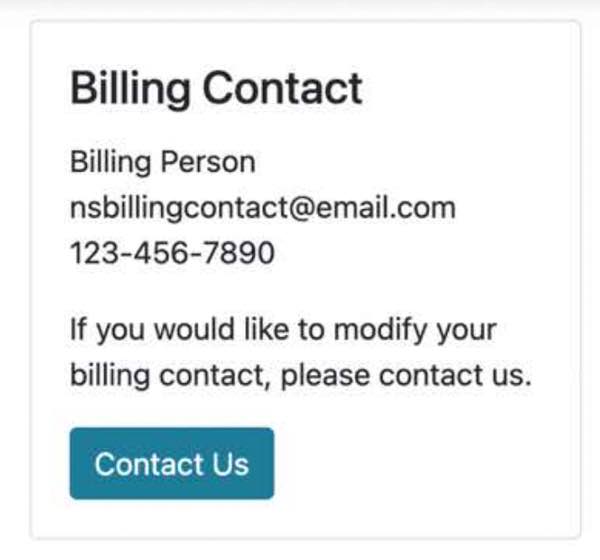
- You can view your location’s current billing contact in the Location Info page.
- To change your billing contact, use the button to Contact Us.
Changing Available Northstar Topics
In admin portal: Location Info tab
- Click Edit Info
- Scroll down to Topics Used.
- Select which Northstar topics you want available for your learners. Note: de-selecting a topic removes both the assessment and the online learning module. If a topic was previously available, you can still search for and view older assessment results.
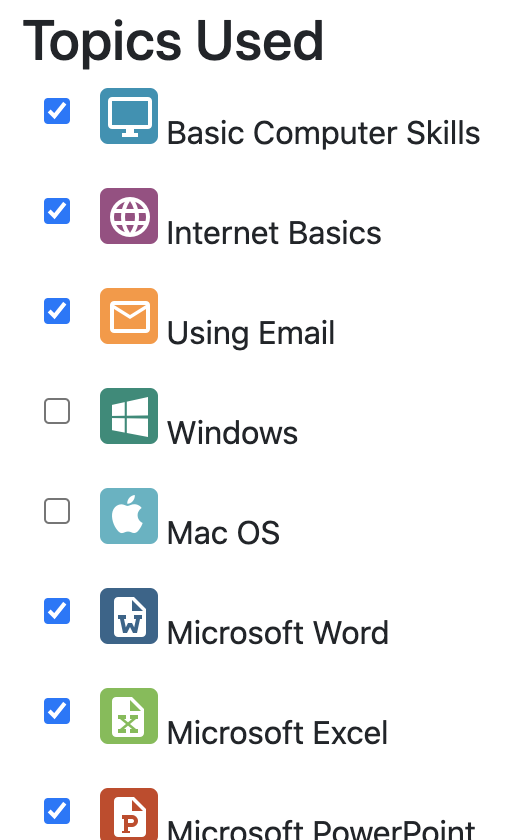
- Click Save Changes at the bottom of the page.
Part 6: Northstar Curricula Resources
Accessing Northstar curriculum

- Log into your Northstar Account.
- Click on the Curriculum tab.
- You can bookmark this page directly for future use: https://www.digitalliteracyassessment.org/curriculum/
What is the Northstar Digital Literacy Curriculum?
- The curriculum is aligned with Northstar Digital Literacy Standards and supports adult learners in meeting the requirements of the Northstar Digital Literacy assessments.
- The Northstar Digital Literacy Standards are Minnesota Adult Basic Education Content Standards, along with the College & Career Readiness Standards for Adult Education (CCRS) and the ACES Transitions Integration Framework (TIF)
- Lesson plans are learner-centered and interactive. The lessons give learners multiple opportunities to build digital literacy skills through practice tasks.
- Lesson plans are independent of each other and are not required to be taught in sequence. They can be taught in order, or teachers may choose lessons for their class based on desired instruction for specific Northstar Digital Literacy Standards.
- Each unit contains 7-9 two-hour lesson plans. The Career Search Skills unit contains 15 lesson plans to support the expanded standards of that topic.
What do you need in order to teach the Northstar Digital Literacy Curriculum?
- The lessons were written to support classroom teachers, as well as volunteer tutors working with small groups. Lessons may be adapted by teachers for one-on-one instruction.
- Access to computers, a projector, and internet are necessary to facilitate the curriculum in person.
- Northstar provides tips for teachers to facilitate the lesson remotely. Please see Northstar Tips for Remote Teaching.
What level learner will the Northstar Digital Literacy Curriculum support?
- The lessons were written to support adult learners at an intermediate English reading comprehension ability or higher; this reading ability is also required to complete the Northstar Digital Literacy Assessments.
- The curriculum will support adult English language learners at an Intermediate Level, as defined by the NRS (National Reporting System) as a CASAS reading level 211, or higher, or a TABE (11-12) Reading Score of 501 or higher. These scores equate to an approximate 4th grade reading level. Because of the predictable structure of the curriculum and because we explicitly identify and give guidance to teach digital literacy vocabulary to support learners reading at an intermediate ESL level, teachers/programs have successfully adapted the lessons on their own for lower level-English learners.
- Please be advised some of the units aligned to the Standards for Using Technology in Daily Life, such as Career Search Skills and Information Literacy, may need a higher level English reading comprehension and digital literacy skills. In particular, we recommend that learners have passed the Basic Computer Skills, Internet Basics, Using Email, and Microsoft Word assessments.
How should I use the Northstar Digital Literacy assessments in conjunction with the curriculum?
- We suggest that instructors give learners the corresponding Northstar Digital Literacy assessment module as a pre-test before beginning instruction in order to assess the standards on which their learners need additional practice.
- Instructors should also give the corresponding Northstar Digital Literacy assessment module as a post-test after teaching curriculum content relevant to the learners.
- We discourage use of the assessments with low-literacy learners with minimal experience using the computers. For these learners we recommend instead using a paper-based screener. These screeners are provided as a quick and easy way to determine whether low-literacy individuals have the level of computer skills needed to take the Northstar assessments in a meaningful manner. If individuals have very low skills, it is best to provide some instruction prior to having them take the assessments, so they do not become frustrated by attempting to complete assessments far above their skill level. There are two versions of the screener for the Basic Computer Skills module, one for large group screening and one for one-to-one screening. The use of these screeners is not required, but recommended for use with low skills. You can find these screeners in the admin portal under Resources -> Other Resources.
How should I use the new Northstar Online Learning resources in conjunction with the curriculum?
- Northstar Online Learning provides the ability for Northstar locations to create individual learner accounts, which include direct links to online instruction and practice resources as well as a display of completed assessments with scores. There is a robust reporting mechanism for ABE programs wanting to claim proxy hours for out-of-class work completed by learners.
- The Northstar Online Learning instruction and practice resources, like the Northstar Digital Literacy Curriculum, are aligned with Northstar Digital Literacy Standards and support adult learners in meeting the requirements of the Northstar Digital Literacy assessments.
- As Northstar Online Learning releases additional instruction and practice resources, direct links to complementary interactive practice tasks will be integrated into some Northstar Digital Literacy Curriculum lesson plans.
- Watch for this logo in the curriculum to link to Northstar Online Learning instruction and practice tasks:
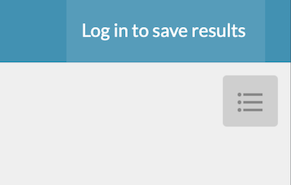
- Please note: When directed through curriculum links to Northstar Online Learning, learners will not be asked to sign in to the Northstar Online Learning platform. In order to save their work, learners must have a Northstar Online Learning account and click the 'Log in to save results' link in the upper-right corner of the interface.
How does the Northstar Digital Literacy Curriculum support the College and Career Readiness Standards (CCRS)?
- The CCRS include standards that require digital literacy, but they are broad and do not detail specific digital literacy competencies. The Northstar Digital Literacy Standards support learners’ development of specific digital literacy competencies needed for learners to meet the academic content standards of the CCRS.
- Across the English Language Arts (ELA) standards of the CCRS, there are multiple references to digital texts and tools, such as engaging with text across “diverse media and formats,” incorporating multimedia components in presentations, and using web features such as electronic menus, hyperlinks, icons, and search tools to comprehend and analyze texts. Standards such as these demonstrate the intersection of digital and print literacy, and require learners to complete tasks that rely on both sets of skills. To meet the standards, learners must develop their print and digital literacies simultaneously. Teachers who have not taught digital literacy in the past are often unsure how to begin incorporating these skills into their ELA instruction. The Northstar Digital Literacy Standards and Northstar Digital Literacy Curriculum provide guidance for teachers on what skills to teach, and how to make those skills accessible to their learners.
- One of the key instructional shifts outlined in the CCRS is Complexity: Regular practice with complex text and its academic language. Digital texts such as websites are, almost by definition, complex texts. In addition to print, they may include images and infographics, video and audio components, and interactive components. Furthermore, in order to address the other key shifts of the CCRS (using evidence and building knowledge), learners must be exposed to a rich variety of nonfiction text. Here again, digital texts are powerful. Much of what we read online is nonfiction text: news and information of all kinds. All of these features make the use of digital texts in the classroom a powerful tool for shifting ELA instruction towards the rigor of the CCR standards.
Where can I give feedback or comments on the Northstar Digital Literacy Curriculum?
- Once you have used the curriculum, you are welcome to provide feedback at https://forms.gle/yc1wJzHXnaHfasJD6. Feedback will be periodically checked, consolidated, and reviewed by the Northstar team.
- We appreciate your feedback. Please understand, we are a small staff, so changes and edits may take some time.
- It is also important to note, Northstar Digital Literacy Curriculum is used in many different classroom contexts, so we may not make a change if it is disadvantageous to other settings.
What resources are available in the Admin Portal to support Remote Instruction of the Northstar curricula?
- Tools & Tips for Teaching Northstar Lessons Remotely: This resource supports teachers connecting with learners for remote digital literacy instruction. It provides ideas for setting up a virtual classroom, scheduling and inviting learners, tips for teaching remotely using the Northstar curriculum, and best practices for proctoring the Northstar assessments from a distance.
- Sample Plan for the First Virtual Class Meeting: This plan gives teaching tips to onboard learners to remote learning platforms.
- Remote Learning Resource Pages: For each lesson plan in the Northstar curriculum, we have compiled a page that includes handouts and other essential visuals to screen share with learners during remote instruction. Some teachers may want to share this resource page with learners prior to instruction through email, or by posting to a class webpage, for example. Remote Learning Resource Pages are available for all completed Northstar curriculum units and can be accessed in the admin portal.
Part 7: Managing your Personal Northstar Account
Editing your personal information
In admin portal, click on your name in top right corner
- Click your name to open a drop-down menu.
- Click on Personal Profile.
- On this page, you can edit your name, email address, phone number (optional), email notification settings, and generate a new proctor PIN.
Resetting your password
On homepage, click 'Log In', in top right corner
- On the homepage, click Log In.
- Click Reset my password.
- Enter the email address with which you have a Northstar account.
- You should receive an email with a link to reset your password. If you do not see the email, make sure to check your Junk/Spam folder.
Getting help
In admin portal: Resources tab
Northstar offers help in three main ways:
- This Northstar Manual (links available on the main website and in the Resources Tab of the admin portal)
- Specific videos showing various processes for proctors
- Creating a Support Ticket
Part 8: Northstar dictionary
Northstar Topic A topic of digital literacy where Northstar Digital Literacy has created a set of standards to be accompanied by an assessment, Northstar Online Learning (NSOL) module, and curriculum unit. Some of our topics include Internet Basics, Using Email, and Microsoft Word. Northstar Standards A set of standards that define the basic skills needed to show basic proficiency for each of our topics. Assessment An assessment designed to assess learner competencies in all of the standards outlined for a topic. Northstar Online Learning Module Online learning modules that feature videos, learning tutorials, and review questions that cover all of the standards for a given Northstar topic. Curriculum Unit A set of lesson plans that cover all of the Northstar Standards for a certain topic. Main public website https://www.digitalliteracyassessment.org/ The Northstar website where the general public can take assessments. Admin portal https://admin.digitalliteracyassessment.org/ The administrative website specific to your Northstar location where your staff can log in with their email address and password. Here, staff members can add learners, view learner progress, check on assessment results, access the curriculum, and more. Assessment-Launch/Testing-Launch Page A testing page unique to your location where your learners can take assessments. All assessments taken via this page will be saved to your admin portal where you can view results. Northstar Online Learning Dashboard The main page learners will use to access the NSOL modules after logging into Northstar. Northstar locations Individual agencies/organizations that subscribe to Northstar. Northstar Manual This document. Detailed manual with instructions on all things Northstar Quick Start Guide A webpage with step-by-step guides and video tutorials to help new staff members get onboarded onto Northstar. Network Multiple Northstar locations that are connected, such as branches of a library system or an associated group of nonprofits. Network Admins People who are the administrators for an umbrella organization, overseeing the administration/reporting of many related Northstar test sites. These users will be accessing the same URL as admins and proctors, but will see a different set of options for what to explore, since their reports will include summary data and multiple sites.
Part 9: Codes of conduct
Test Taker Code of Conduct
If a test taker violates the code of conduct, the proctor will ask the test taker to stop the assessment.
- Test taker must listen carefully to all instructions given by proctor.
- Test taker must treat others with courtesy and respect during the assessment process.
- Test taker should ask questions prior to the assessment if they are uncertain about the certification process.
- Test taker should inform the proctor in advance of any accommodations needed.
- Test taker must represent themself honestly during the assessment.
- Test taker must put away all electronic devices and notes during the assessment.
- Test taker should inform the proctor if the assessment conditions affected the results.
- All test takers planning to take the assessment must present a current identification with their name and photo before being allowed to take the assessment to gain certification.
- Acceptable forms of ID include passports, foreign and domestic state-issued ID cards, school ID cards, human services cards, military ID cards and similar identification.
Proctor Code of Conduct
- Proctors should provide a clean, quiet, and appropriate space for the assessment session.
- Proctors should never leave an assessment session unsupervised.
- Proctors should observe test takers without being intrusive.
- Proctors should end the current assessment session for any test takers caught violating the Test Taker Code of Conduct.
- Proctors will not allow any test taker violating the code of conduct to retake assessment in the same session.
- Proctors will start test-taker check-in and the assessment at the scheduled times.
- Proctors will respect the confidentiality of all test takers.
- Proctors will interact with all test takers in a courteous, fair, professional and nondiscriminatory manner.
- Proctors and Northstar locations must make reasonable accommodations to ensure equitable access for clients with disabilities.
- Proctors should be knowledgeable about computers to assist with any technical problems that might arise.
- Proctors are only allowed to answer questions about the assessment setup or mechanics when administering assessments.
- Proctors may not answer content-related questions as they would jeopardize the validity of the assessment.
Part 10: Generating reports
- Assessments: Generating Location-Wide Summary Reports
- Assessments: Generating Location-Wide Detailed Reports
- Assessments: Viewing and Downloading Individual Results
- NSOL: Viewing Learner Progress and Generating Progress Reports
- NSOL: Viewing and Downloading Usage Reports

© 2012-2024 NDL • Northstar is a program of Literacy Minnesota
Northstar Digital Literacy
A program of Literacy Minnesota 700 Raymond Avenue, Suite 180
St. Paul , MN 55114
